F-2 Hybrid Chain


About this Tutorial
This course is intended for intermediate learners of this Fusion 360 and/or interested in the subject of Modeling and CADing. Self-taught users can also profit from the structure to consolidate more developed concepts. Here you will learn to take you model already made in the last tutorials and create 2D representation of it, so you can export you drawings. Then you will learn how to modify and crop your context to be available to 3D Print it. To be available to express your context fully in printed 2D and 3D, to then develop manually an architectural project.
Skill level and duration
Level: Intermediate Users
Duration: A couple of hours tops!
In this tutorial you will learn
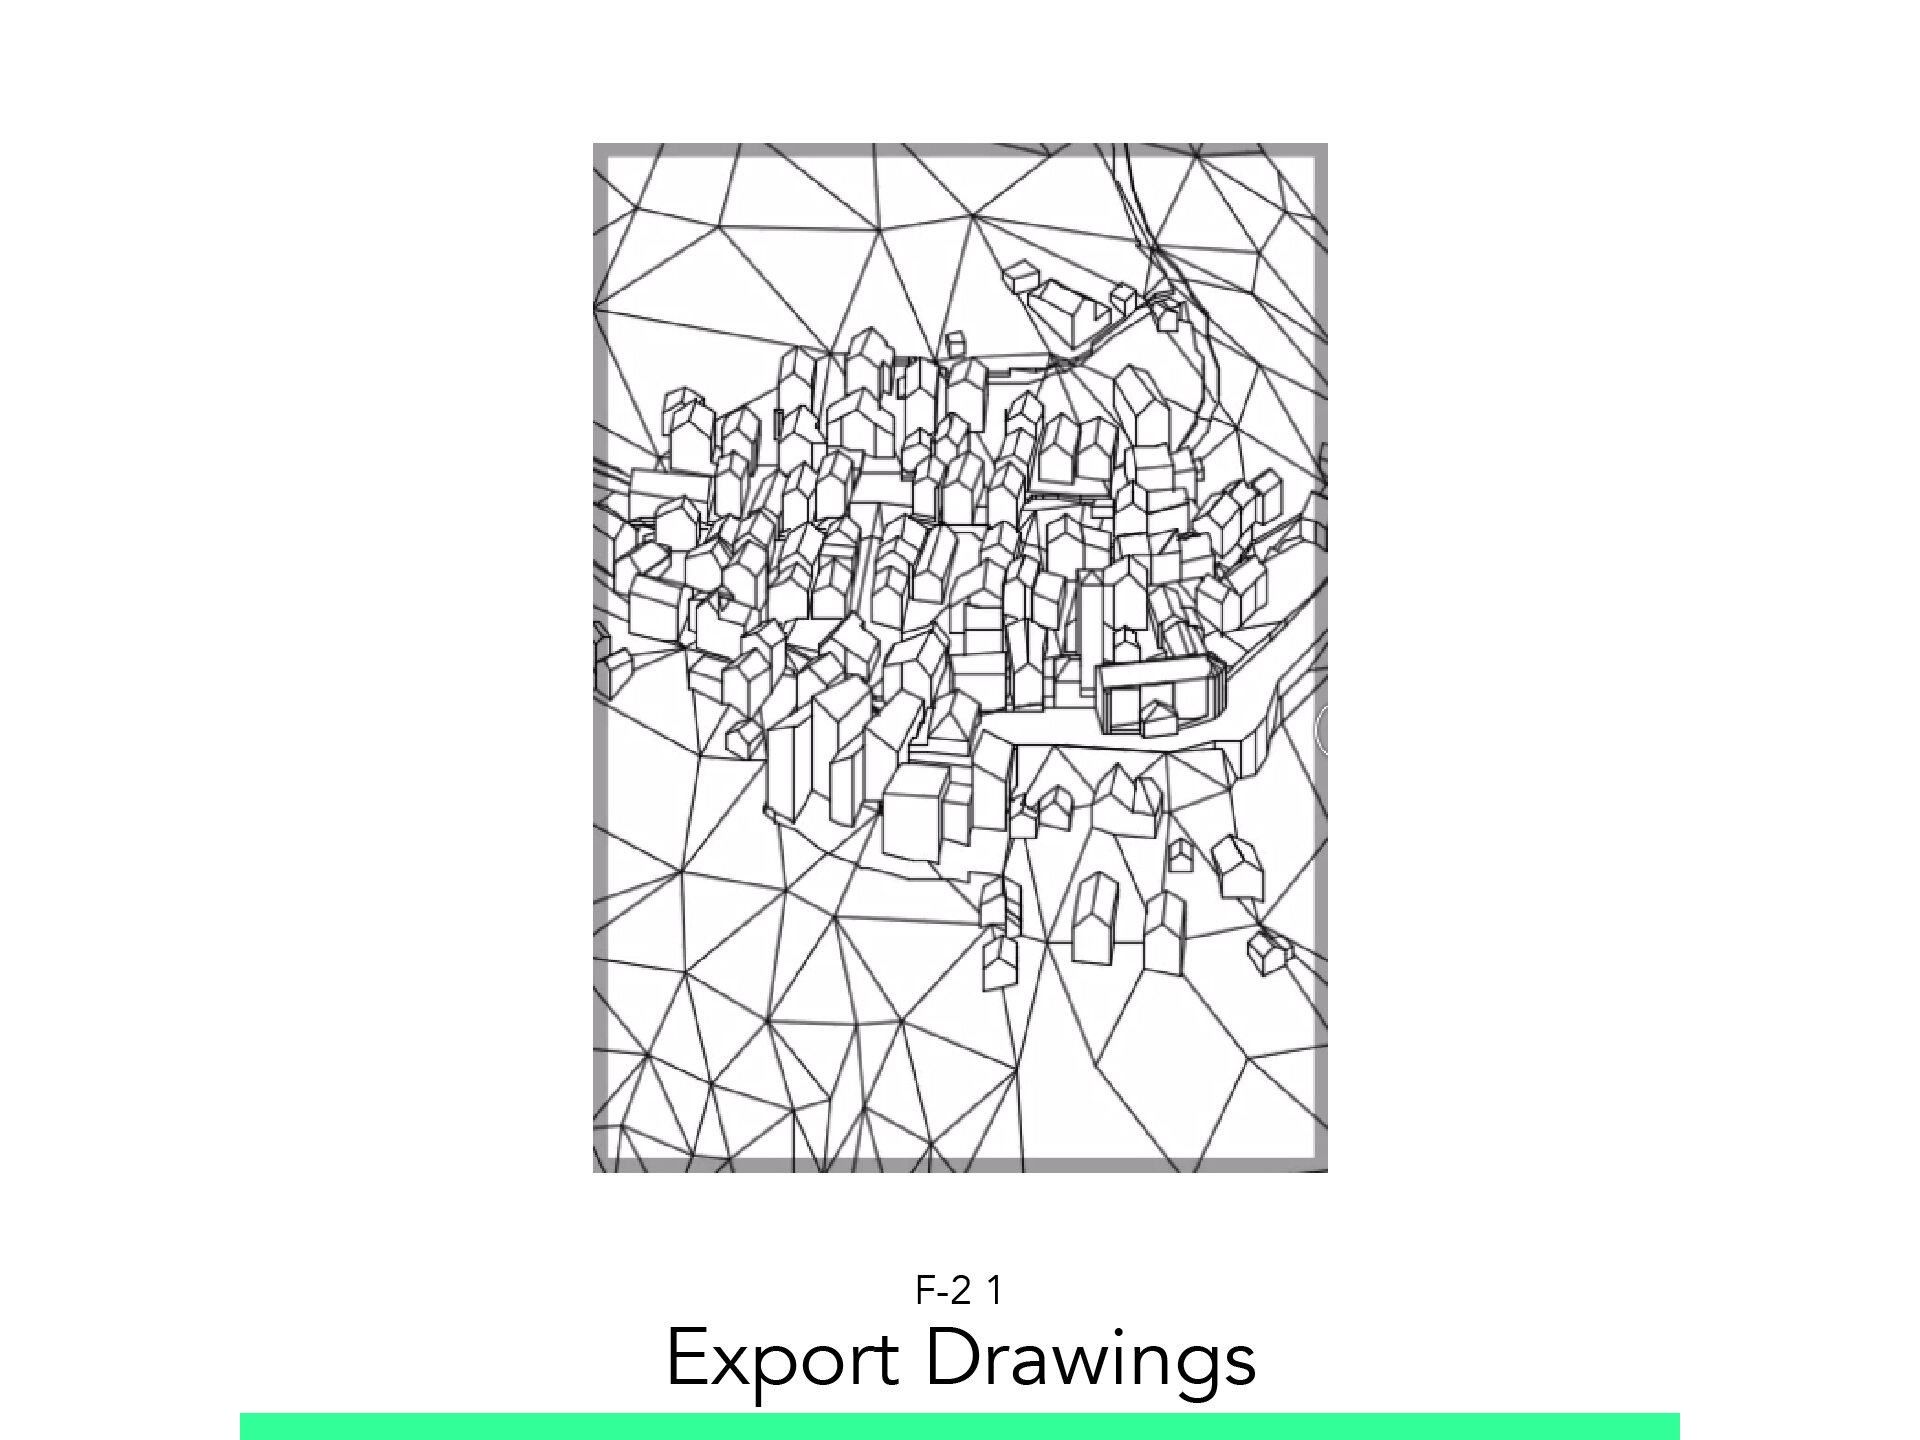
Export Drawings
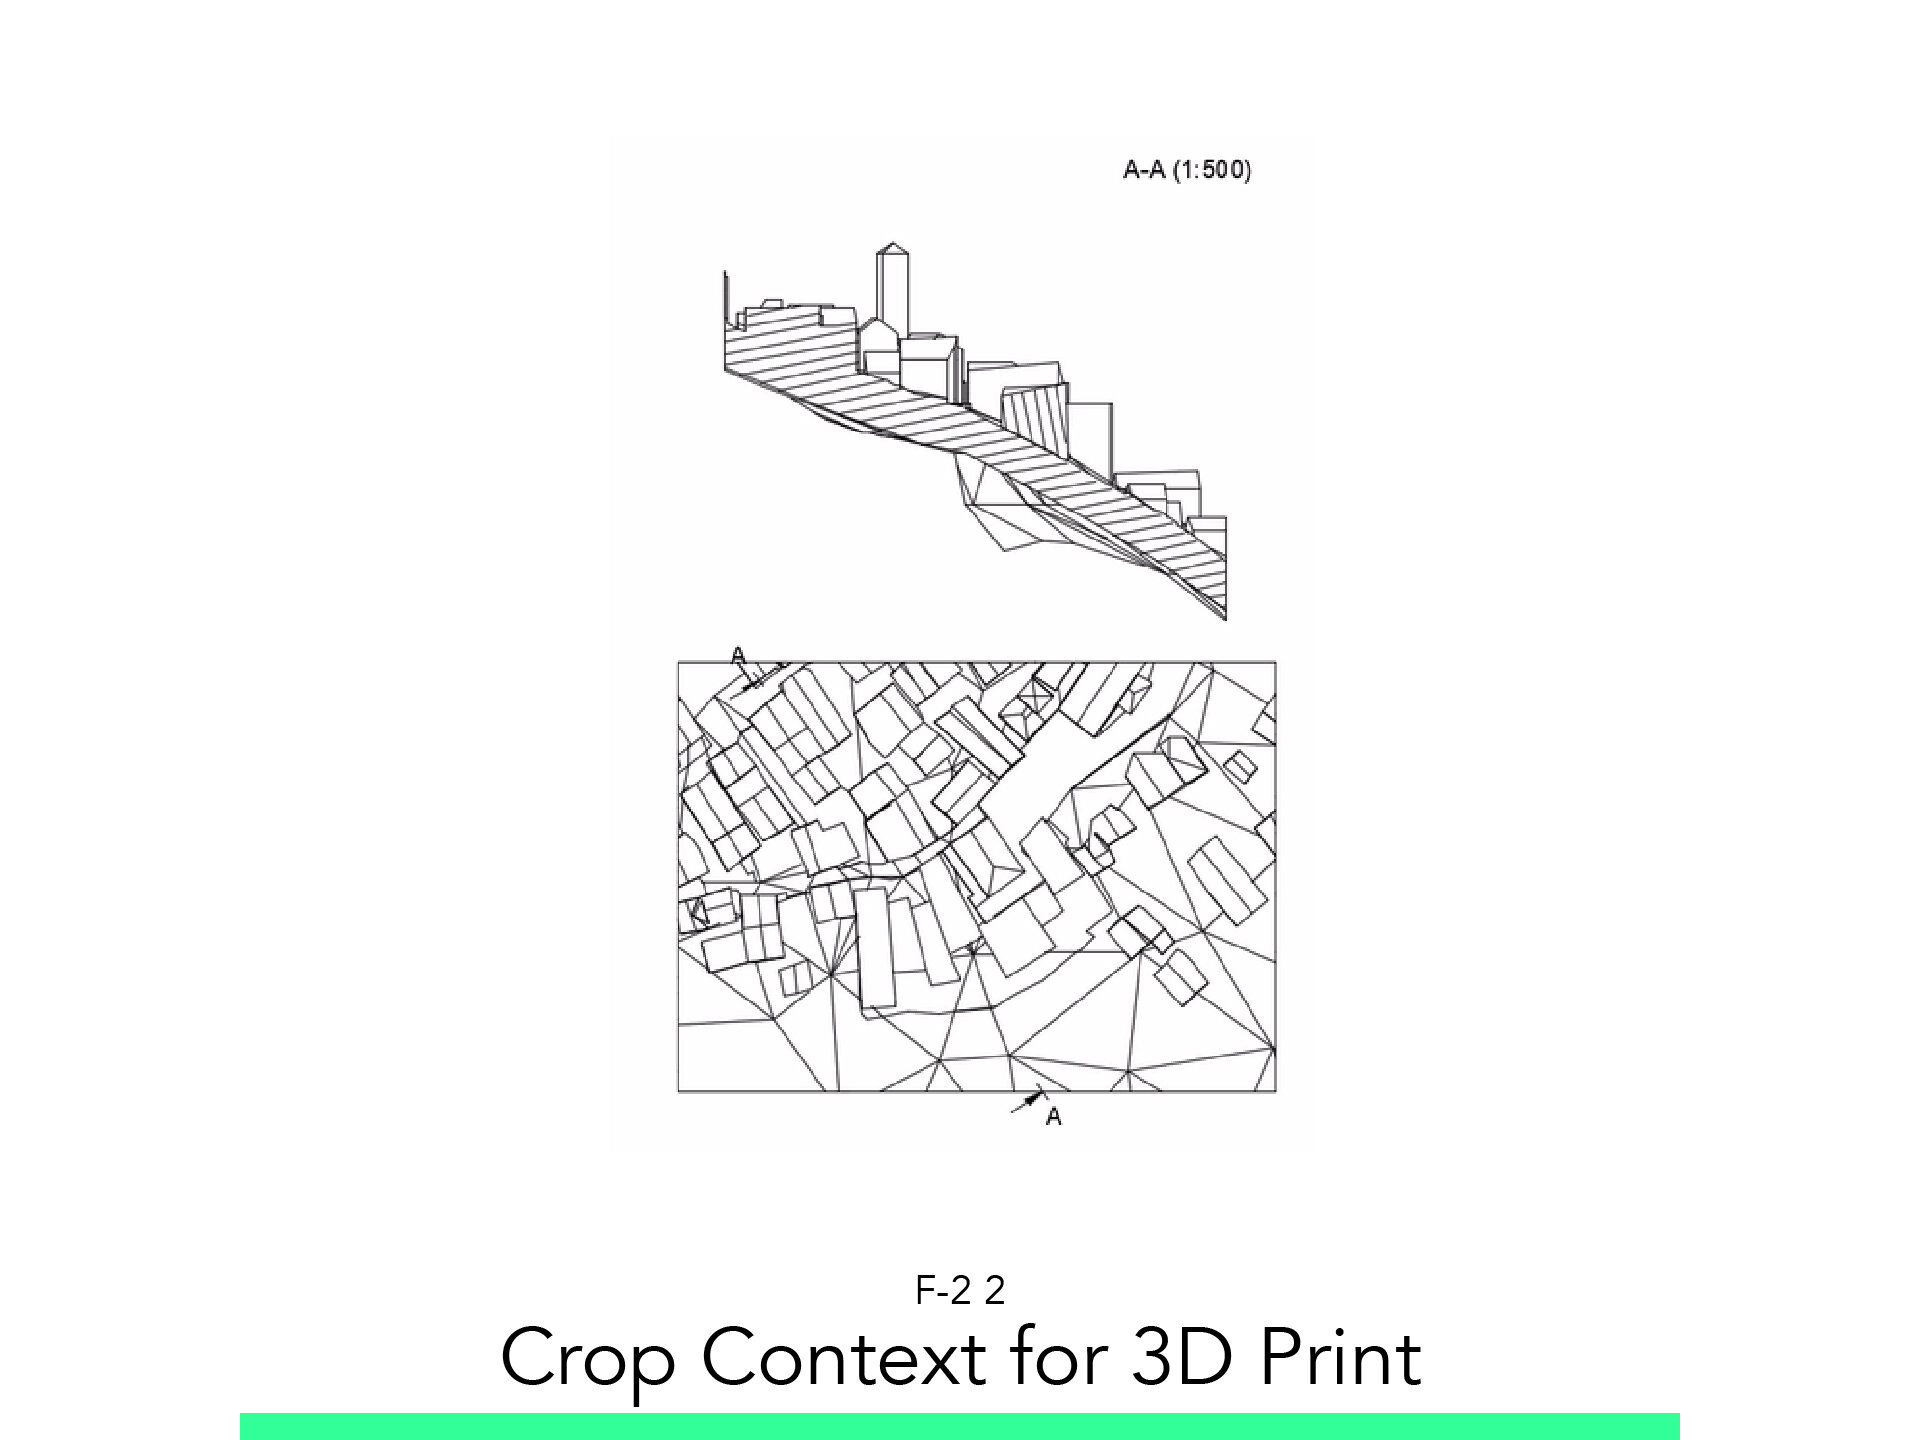
Crop Context for 3D Print
The materials you will need
Your laptop with internet connection to download and Install Software during the course.
Tutorial content
• 2 Videos
• Full Tutorial Script
• Sample 3D File
Why take this tutorial
This tutorial is a good checkpoint of the things you develop for your project. After you have already modeled your context with the buildings and topography you can take that model and create 2D representation that you can print to sketch over it and iterate ideas for your project. And also export a model to 3D print so you can have physically a model to see an analyze. This is a good step of your context study to develop your architecture ideas.
1. Export Drawings

1.1. Sheet Settings
Go to the Drawing Workspace and click on From Design.
Set the kind and position and size of the Paper.
Set the shading and scale on the side panel, disable the Title.
Click on the final position of the drawing.
Adjust the Sheet Settings:
Context: Full Assembly
Paper: A4
Accept.
Adjust the Drawing Settings:
Set Shading
Set the View
Set the Scale
Click on Sheet to set position.
1.2. Document Settings
Adjust Document Settings:
Line Wight Group: Very Thin.
Adjust Paper Settings:
Format: A4 Portrait
Display Border: No
Display Title Block: No
1.3. Generate Views
Generate Sections:
Create new Sheet
Generate Vertical Section
Generate an Axonometry
Create a New Sheet
Start a new Base Drawing.
Set as AXO
Shaded
Scale that fists in the Paper
2. Crop Context for 3D Print

2.1. Crop Context
Run the File with your Project or use the Start File provided.
Restart the Capture Design History.
Select the Context and start the move command.
Set Copy option.
Set 10m in the Z axis.
Accept.
Rename original as Model Full and turn off.
Mode the newly created -10m on the Z Axis.
Start the Offset Plane command.
Offset the planes X and Y to have a good crop of the context.
Start the Split Body command.
Select the Context as Target.
Select first the two X planes as Splitting Tools.
Execute.
Turn the Unneeded Body Off.
Restart the command and repeat but this time selecting the Y planes as “Splitting Tools”.
Rename the created Bodies.
2.2. Export STL
Select the piece you wish to export.
Go to the Tools Tab.
Select 3D Print.
Save STL.
2.3. Export Sketch
Go to the Drawing Workspace and click on “From Design”.
Set the kind, position and size of the Paper.
Set the shading and scale on the side panel, disable the Title.
Click on the final position of the drawing.
Adjust Document Settings:
Line Wight Group: Very Thin.
Adjust Paper Settings:
Line Wight Group: Very Thin
Display Border: No
Display Title Block: No
Adjust the Crop (Optional):
Using the Design History.
Redefine the Offset Plane.
Generate Sections
Generate Vertical Section.
Export PDF.
Follow your study path with these recommended tutorials


Model in ArchiCAD for the absolute first time with me!
Let me teach you basic commands of the software for you to be ready work on your projects. Start from the very basics and follow me step-by-step in the process of giving more detail to your architectural model.