F-1 Model a Sketched Idea in Fusion 360


About this Tutorial
This course is intended for intermediate learners of Fusion 360 or/and interested in Modeling as a subject. Self-taught users can also profit from the structure to consolidate more developed concepts. Here we will use Fusion 360 to import some hand sketch we made, insert it in our model to then create the different iterations we have created. Finally we will insert in a modeled context to see the integration of the architectural project.
Skill level and duration
Level: Intermediate Users
Duration: A couple of hours tops!
In this tutorial you will learn
Hand Sketching with “Sketching Base”
Import and Scale Sketches
Model your Idea
Import Modeled Context
The materials you will need
Your laptop with internet connection to download and Install Software during the course.
Tutorial content
• 4 Videos
• Full Tutorial Script
• Sample 3D File
Why take this tutorial
Here you will learn basic task to insert hand sketches to Fusion 360 of your architectural project, to then fully model it and be available to join it to a context model that its going to be inserted as an STL, learning how to use STL files too as a base to your 3D model in Fusion 360. This are basic and useful skills to develop as an architect to fully employ Fusion 360.
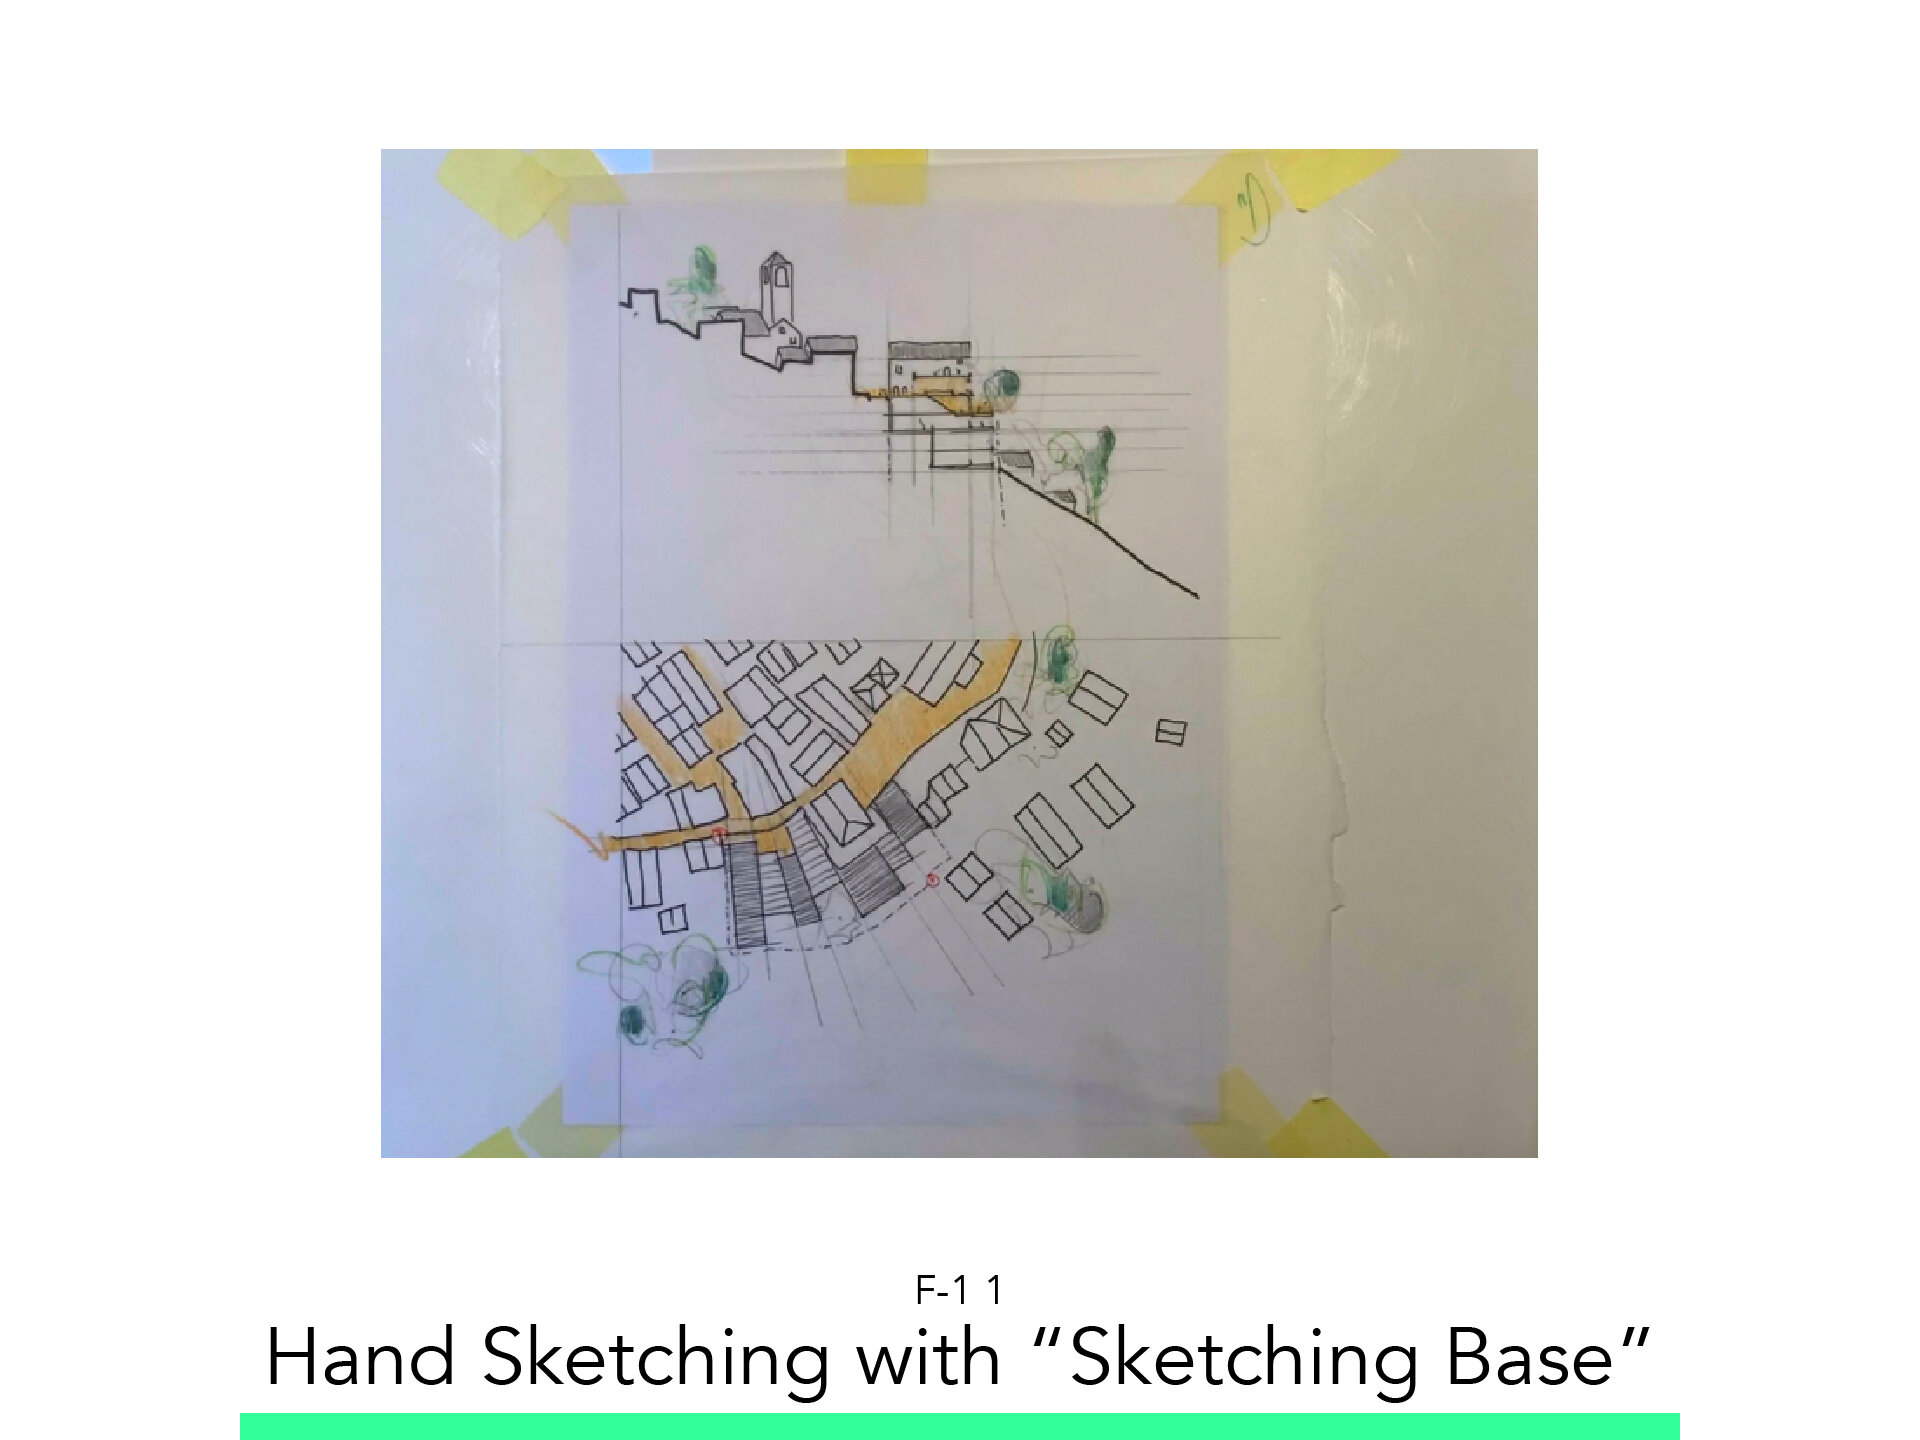
1. Hand Sketching with “Sketching Base”

1.1. Sketch Volume
Sketch a Volume in the Marked Plot.
Draw two discernible reference points.
Scan it or photograph it.
Save the Image as JPG.
1.2. Workflow Tips
Paste your sketching base on your table.
Place a Strip of Sketching paper on top and paste it.
Find a good Horizontal line and Trace it in 2H.
Generate a good Vertical line from it and Trace it 2H.
Trace the relevant context.
Place a loose Trace paper and start drawing a first idea.
then a second.
then third.
Once you commit to one.
Trace a full sketch of relevant context and Idea.
Draw a Graphic Reference.
Find two good points from the Sketching base and Mark them precisely.
Draw a Line with a precise Measure and write it down.
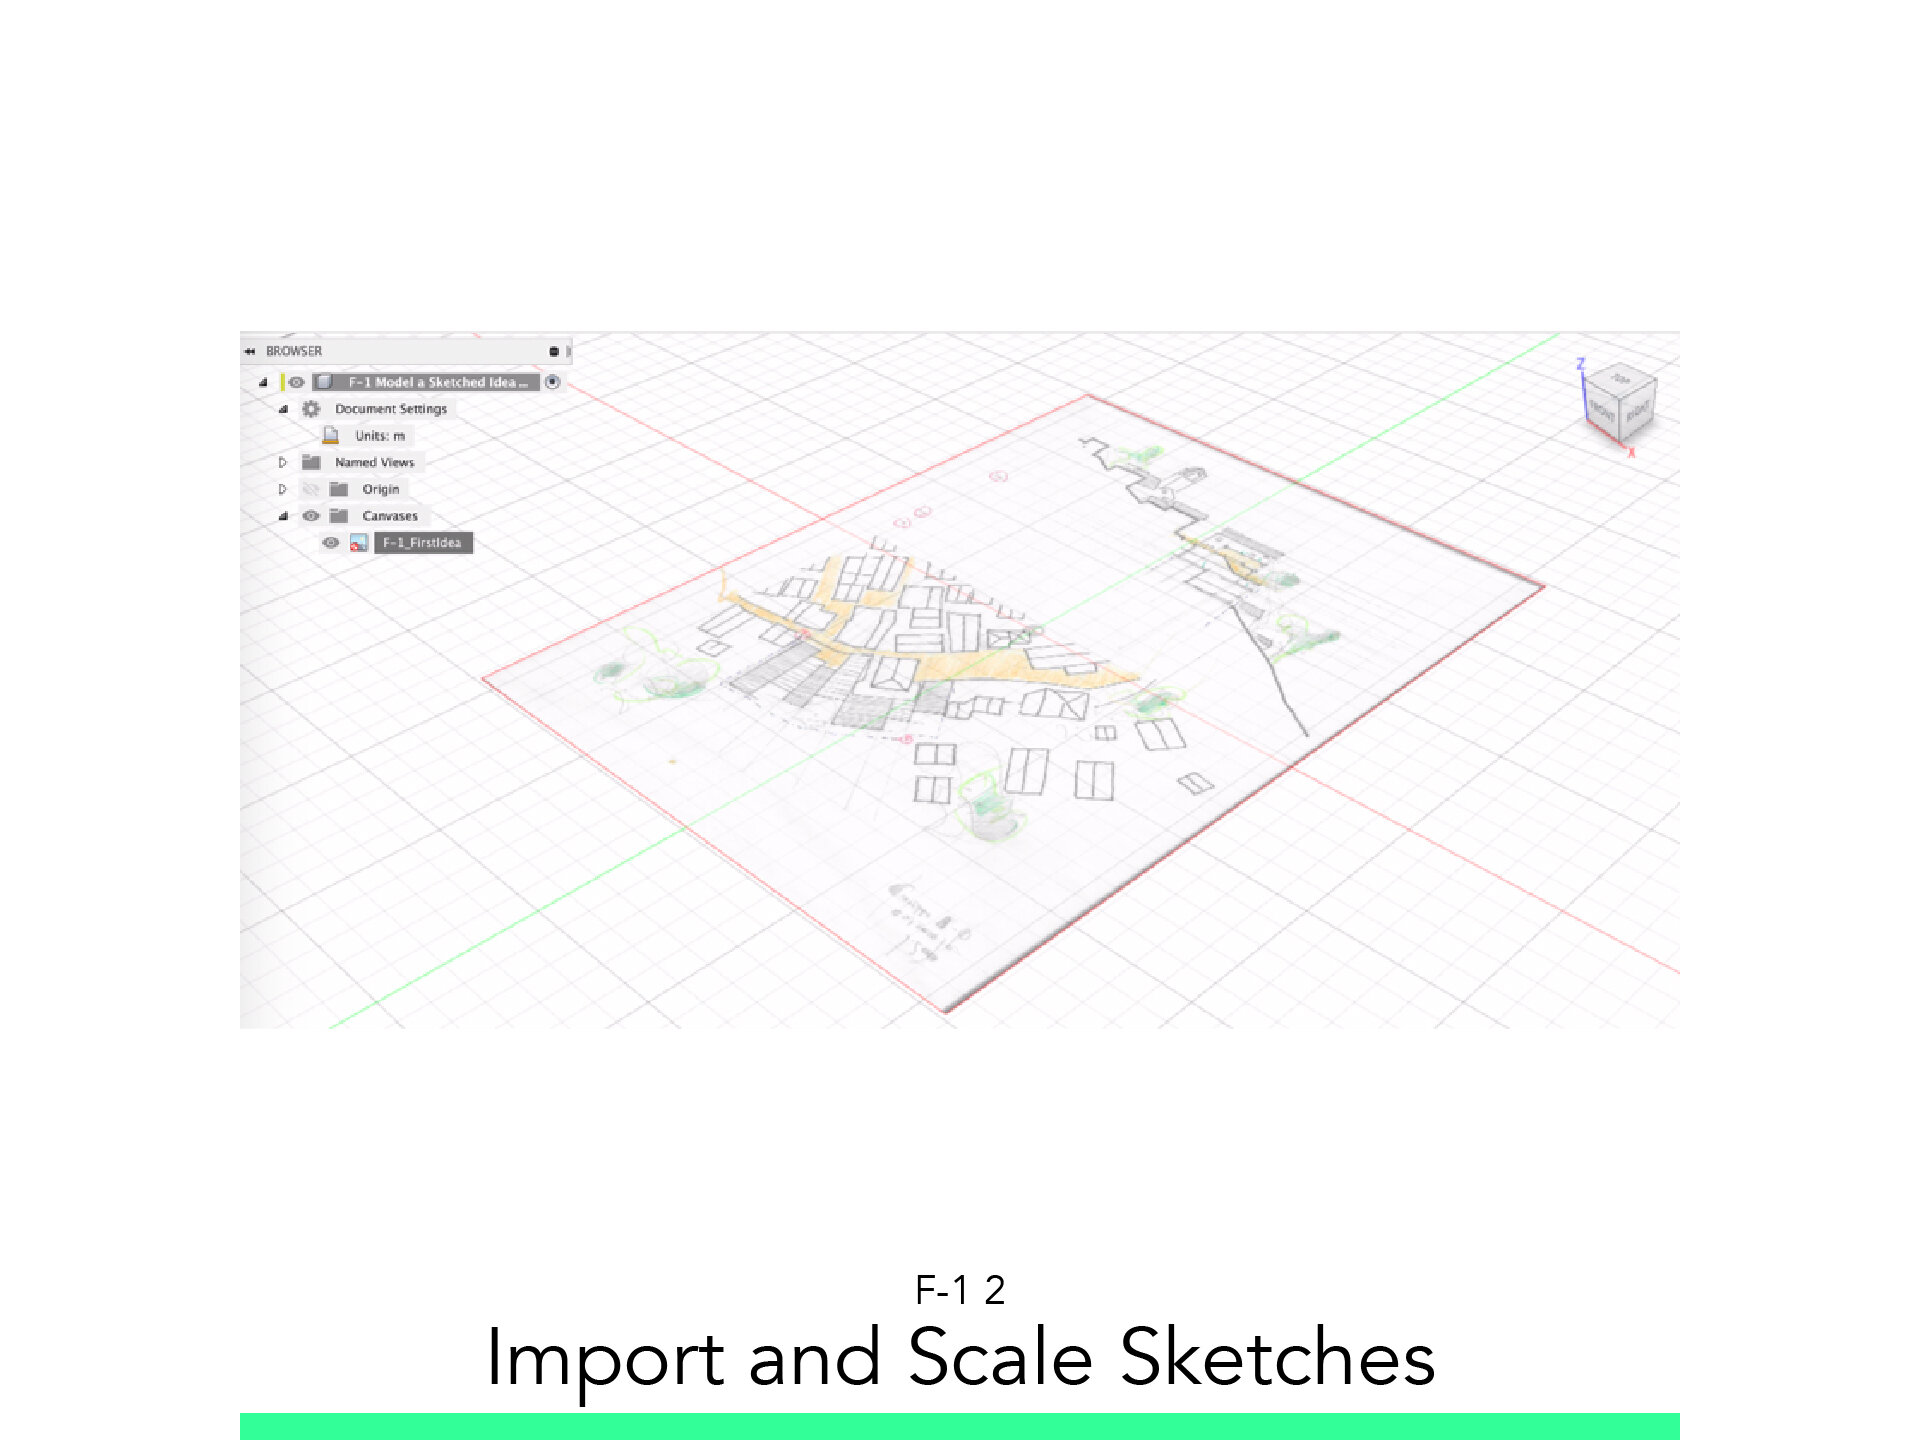
2. Import and Scale Sketches

2.1. Insert Canvas
From Solid Tab click on Insert Canvas.
Insert from my computer.
Find your sketch.
2.2. Plane Import
Select the plane you want your sketched to imported in.
Click OK on the Left Panel to accept the command.
2.3. Calibrate
From the Element panel, Right Click on the Canvas imported.
Select Calibrate.
Click on the first vertices of your graphic scale.
Then the next corner.
Enter the value in Meters it should have.
Accept the command.
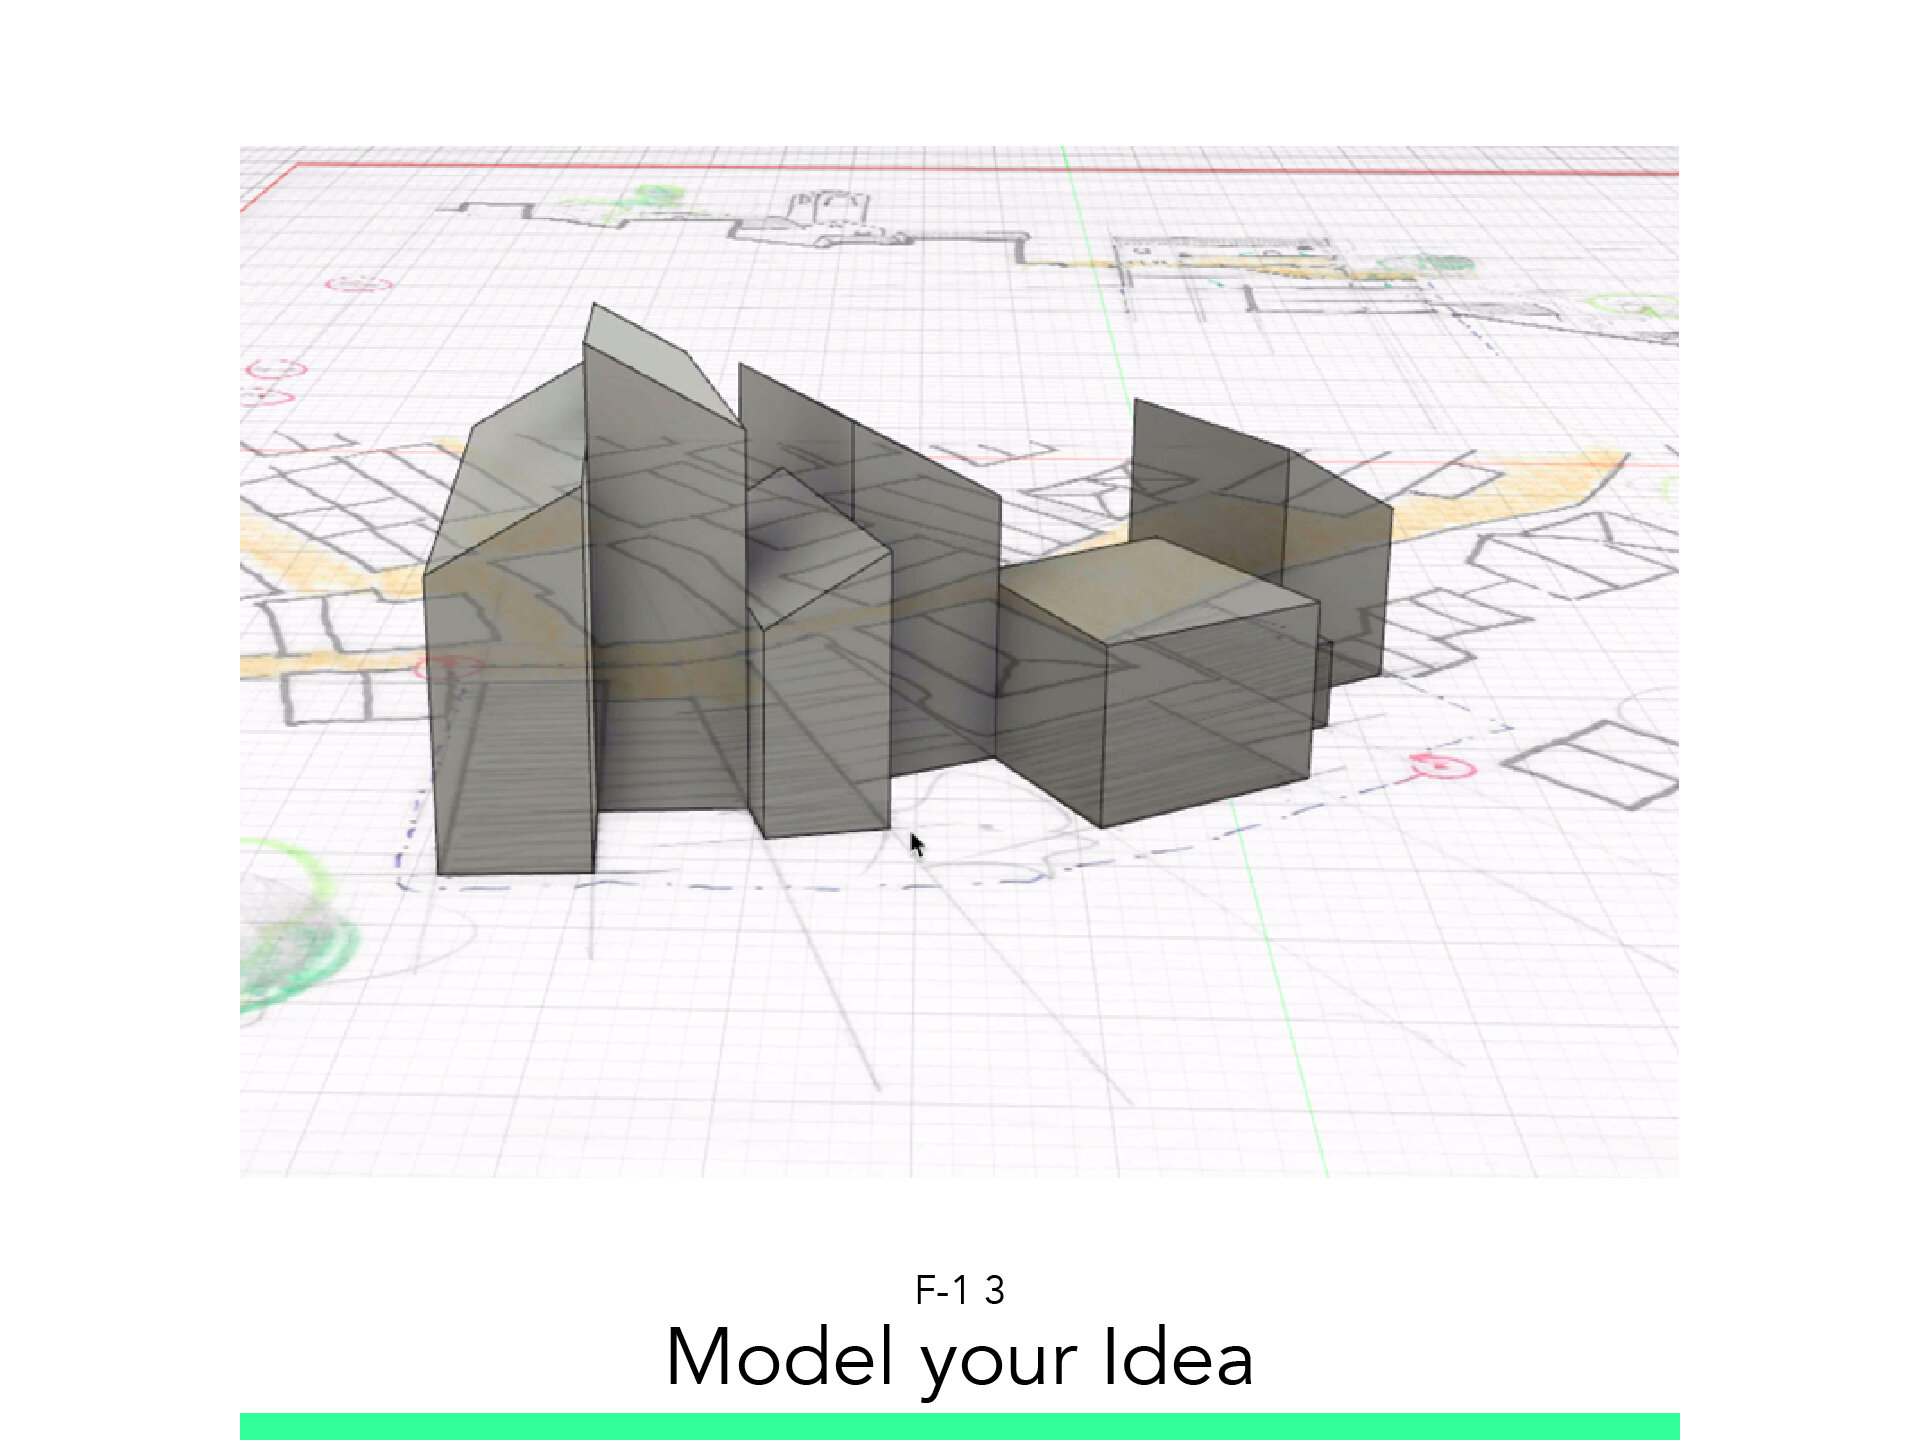
3. Model your Idea

3.1. Draw the 2D Contours
From the Solid Tab click on Sketch.
Select the plane you want to sketch on.
Start drawing on top of your design.
When finished, click OK from the right Panel.
Click on Home.
3.2. Extrude
Hover your mouse on top a sketched surface.
Select it.
Run the Extrude Command.
Click to extrude.
3.3. Chamfer Edges
Right Click on the edge.
Select the Chamfer command.
Set a value.
Accept the command.
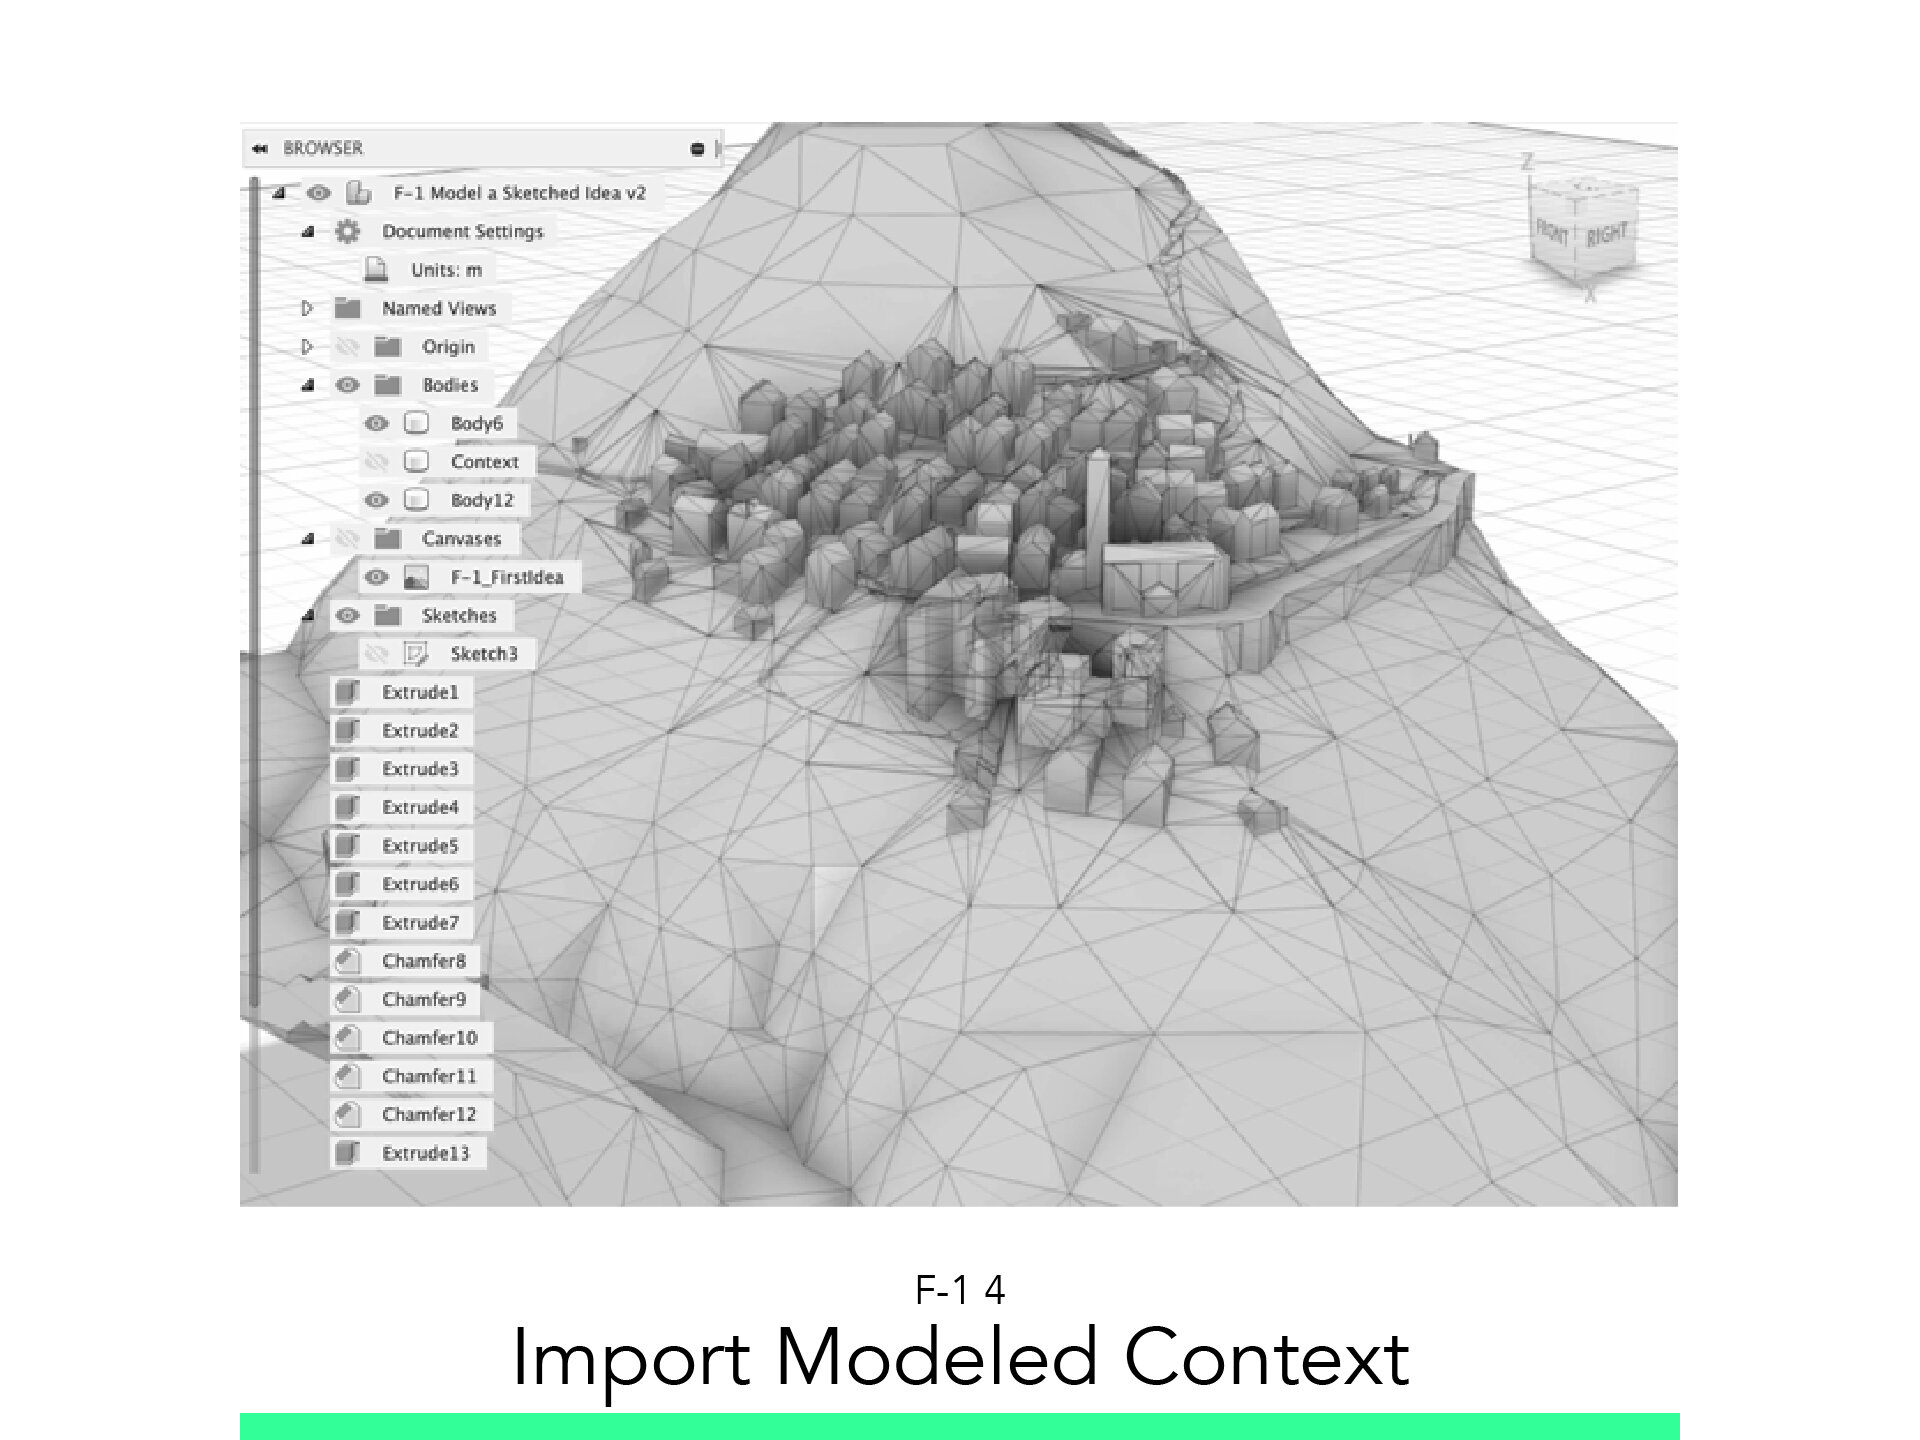
4. Import Modeled Context

2.1. Import as STL and Convert to BRep Solid
Click on insert.
Select Insert Mesh.
Browse and find the Model.
Right Click Convert Mesh to BRep.
Stitch.
Change the tolerance until all green.
Using the Top View.
Move the context to match the position of your sketch.
2.2. Import Context from Link Folder
From the Links Folder, Run the File:
“F-0_Corippo_Context_1to1”
Save it in your Folder
Go Back to your Original File:
Open the Project Tab.
Right Click the Context File and select: Insert into current Design.
Right Click the Chain, and select Break Link.
Click and Drag the Solid into the Main File name.
2.3. Extract Terrain
From the home view:
Select the Terrain.
Start the combine command.
Select your Project and set as target.
o Make sure the terrain is set as Tool.
Check the Keep Tools box.
Execute.
Follow your study path with these recommended tutorials


Model in ArchiCAD for the absolute first time with me!
Let me teach you basic commands of the software for you to be ready work on your projects. Start from the very basics and follow me step-by-step in the process of giving more detail to your architectural model.