Tm-1b White Rendering Basics in Twinmotion


About this Tutorial
This course is intended for first time Twinmotion or Rendering users. Self-taught users can also profit from these structures to consolidate essential concepts. We will create our first White Render in Rhino, continuing the Modeling work we made in Ri-0a. You will start to use Twinmotion to create outdoor and indoor renders of an architectural project while learning the basic skills you need to express it. Learn how to set the camera, environment, artificial lights and add white textures to create a clear and useful render for an architecture project.
Skill level and duration
Level: First Time Users
Duration: A couple of hours
In this tutorial you will learn
Camera Setup
Render Settings
Sunlight
Artificial Light
White Textures
The materials you will need
Your laptop with internet connection to download and install software during the course.
Tutorial content
• 5 Videos
• Full Tutorial Script
• Sample 3D File
• Support Files
Why take this tutorial
White Rendering is a good starting point to learning about rendering. It is very useful for showing an idea and provides a clear image of the space. You will learn basic skills to understand the various topics that surround rendering. This course is very useful to start practicing work in Twinmotion to eventually create beautiful, expressive renderings.
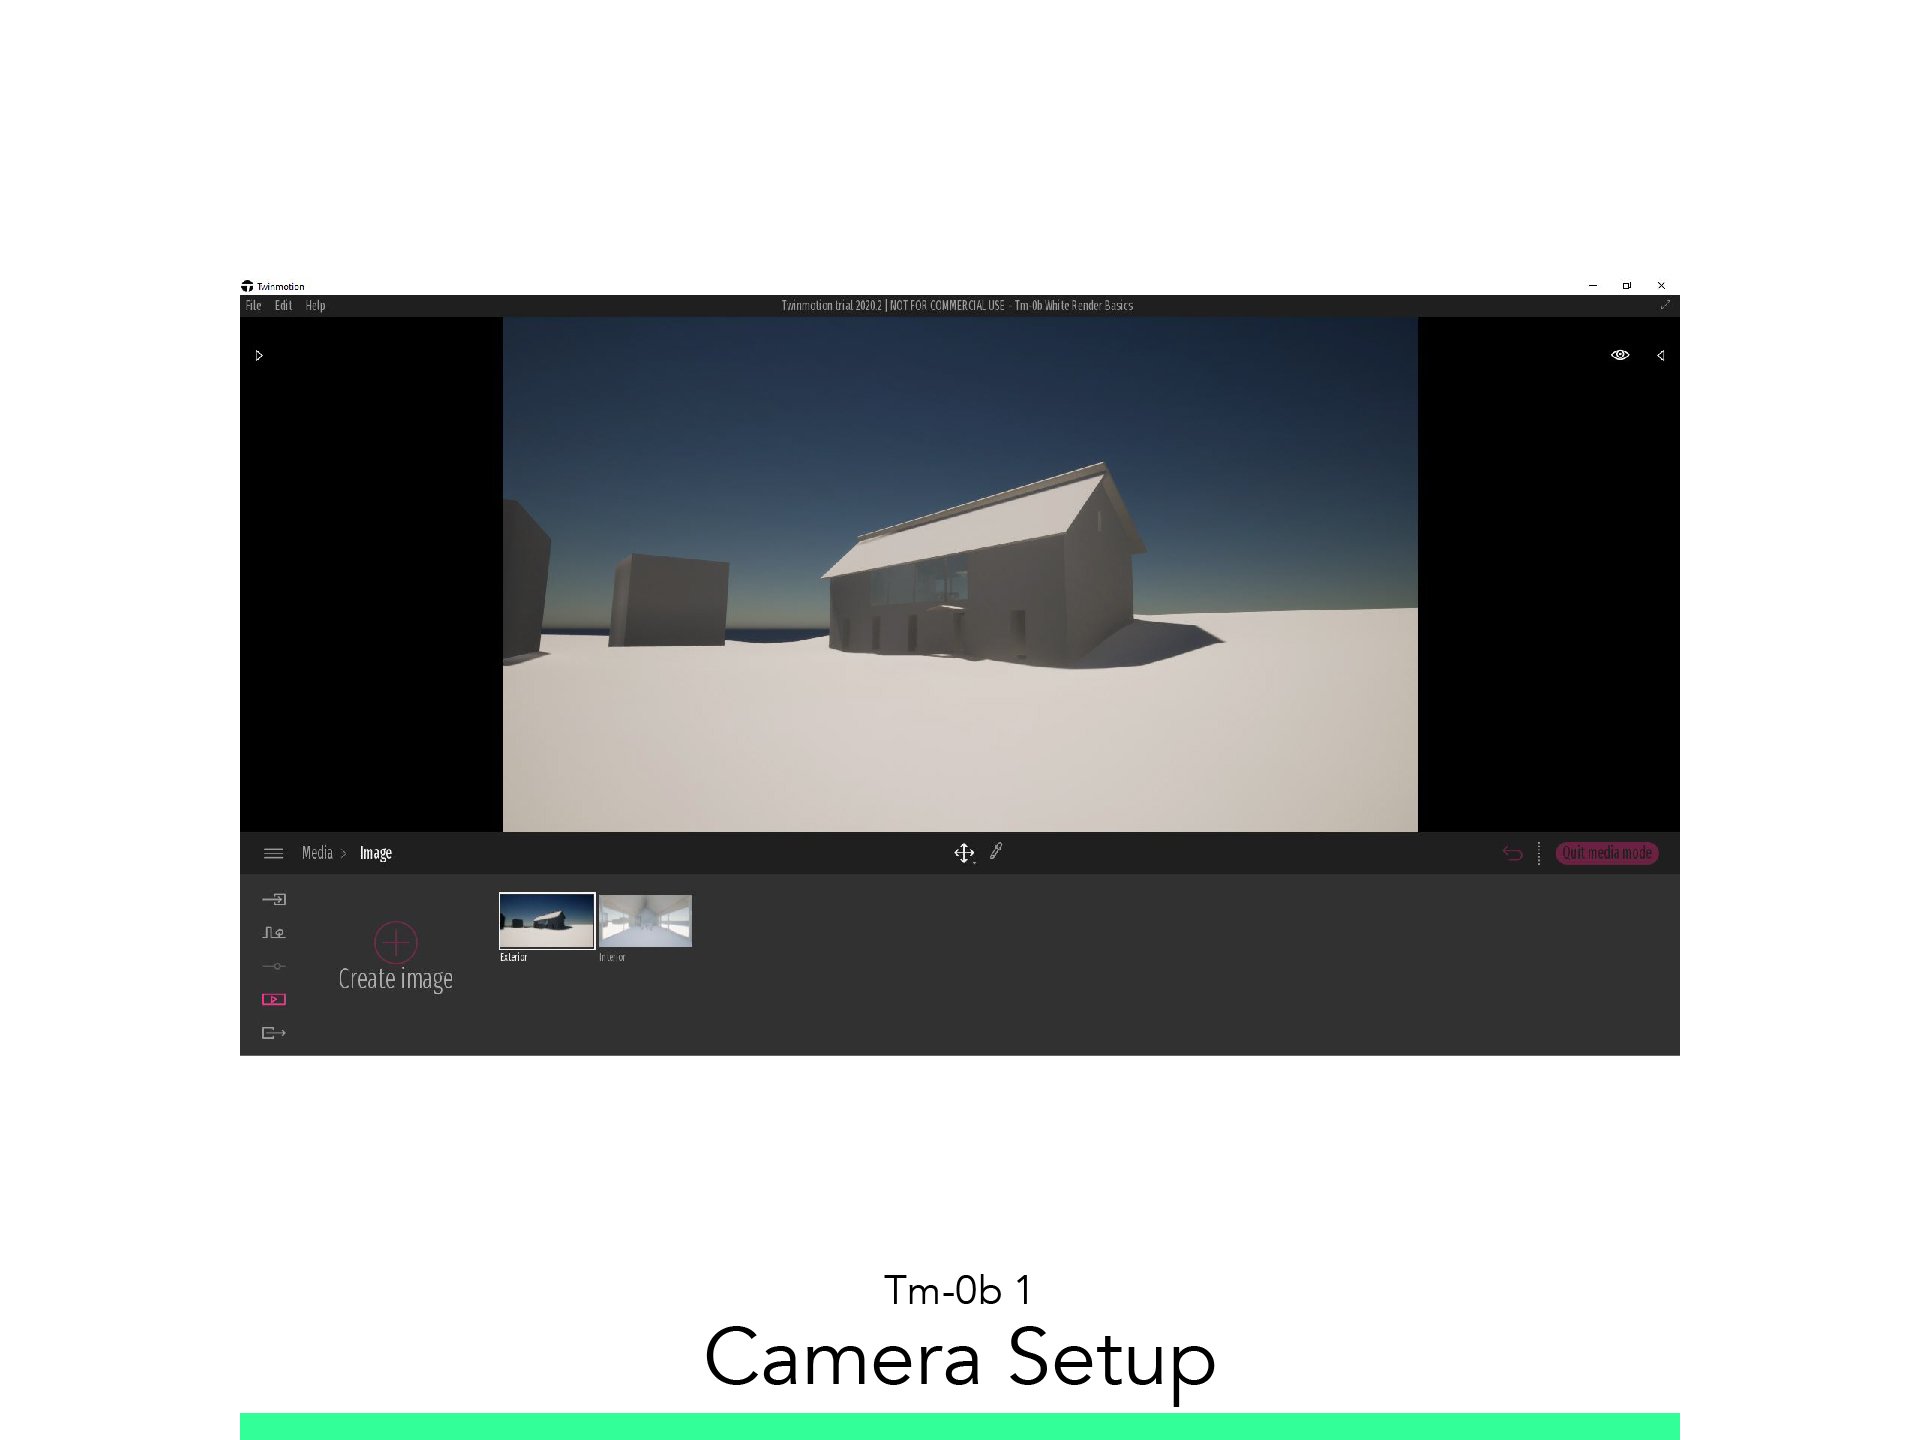
1. Camera Setup

1.1. Viewport
To Orbit: Shift + Click Mouse Wheel
To Pan: Click Mouse Wheel
To Zoom: Scroll Mouse Wheel
To Save View go to the Lower Bar > Media > Image > Create Image
1.2. Setup Camera
Go to the Lower Bar > Settings > Camera
Set Camera Filed of View (FOV)
Set Two Point Perspective Parallelism
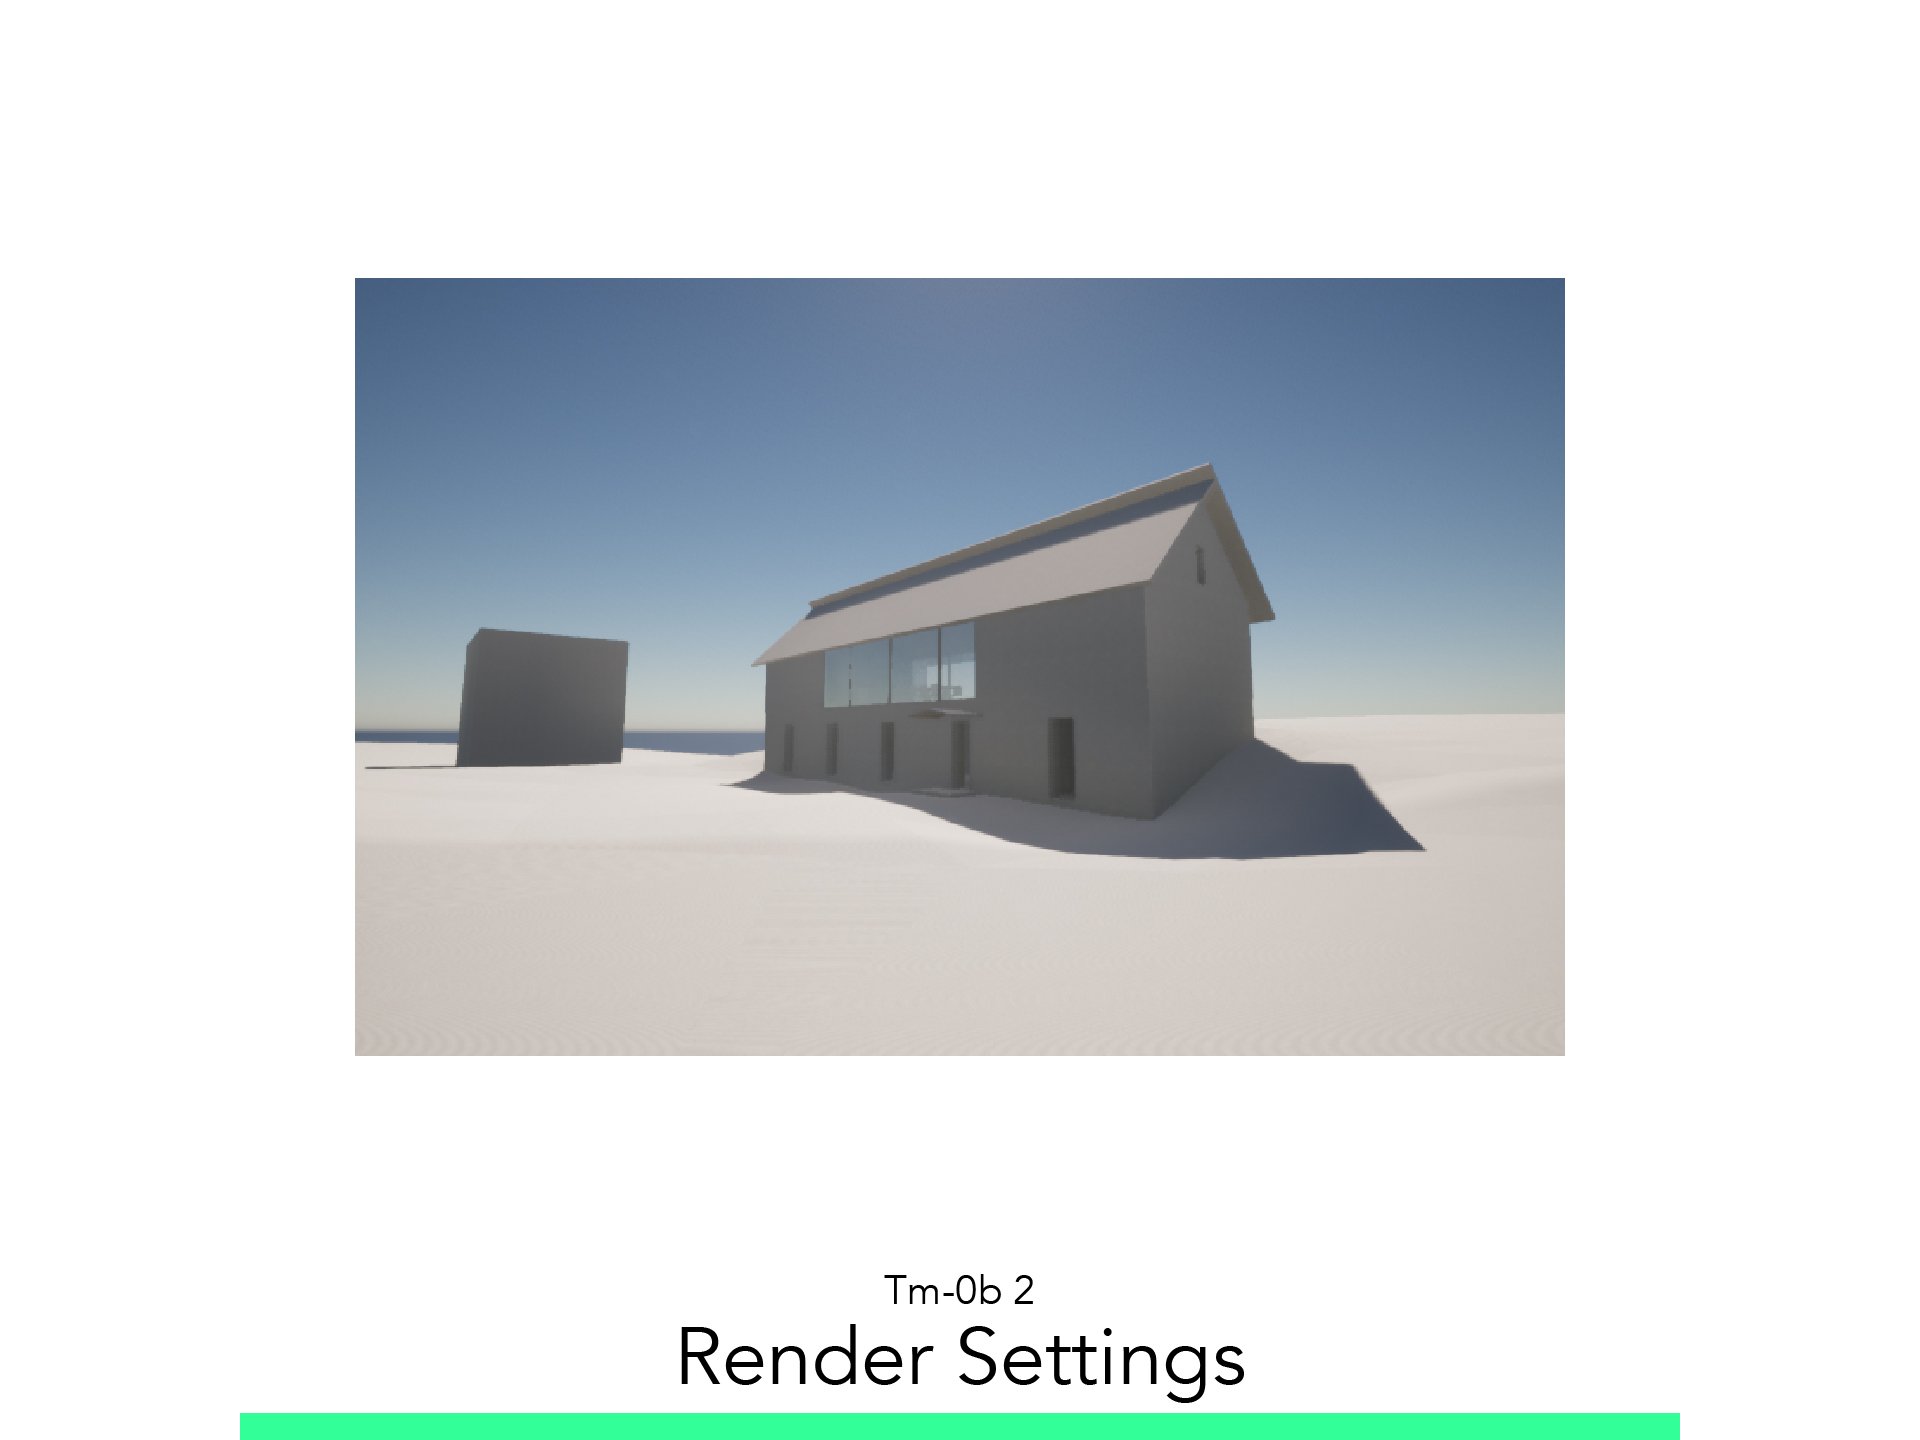
2. Render Settings

2.1. Create Image
Go to Lower Bar > Media > Image
Click on: Create Image
2.2. Render Settings
Go to Lower Bar > Media > Image
On the Created Image click More
To change Render Size and Quality Format > More
Adjust the Following Settings
Size: 800x450
To change Background Go to Lower Bar > Media > Localization
Enter to Background
Picture: None
2.3. Render!
Go to Export.
Select in Image Outside.
Start Export.
Select the location file.
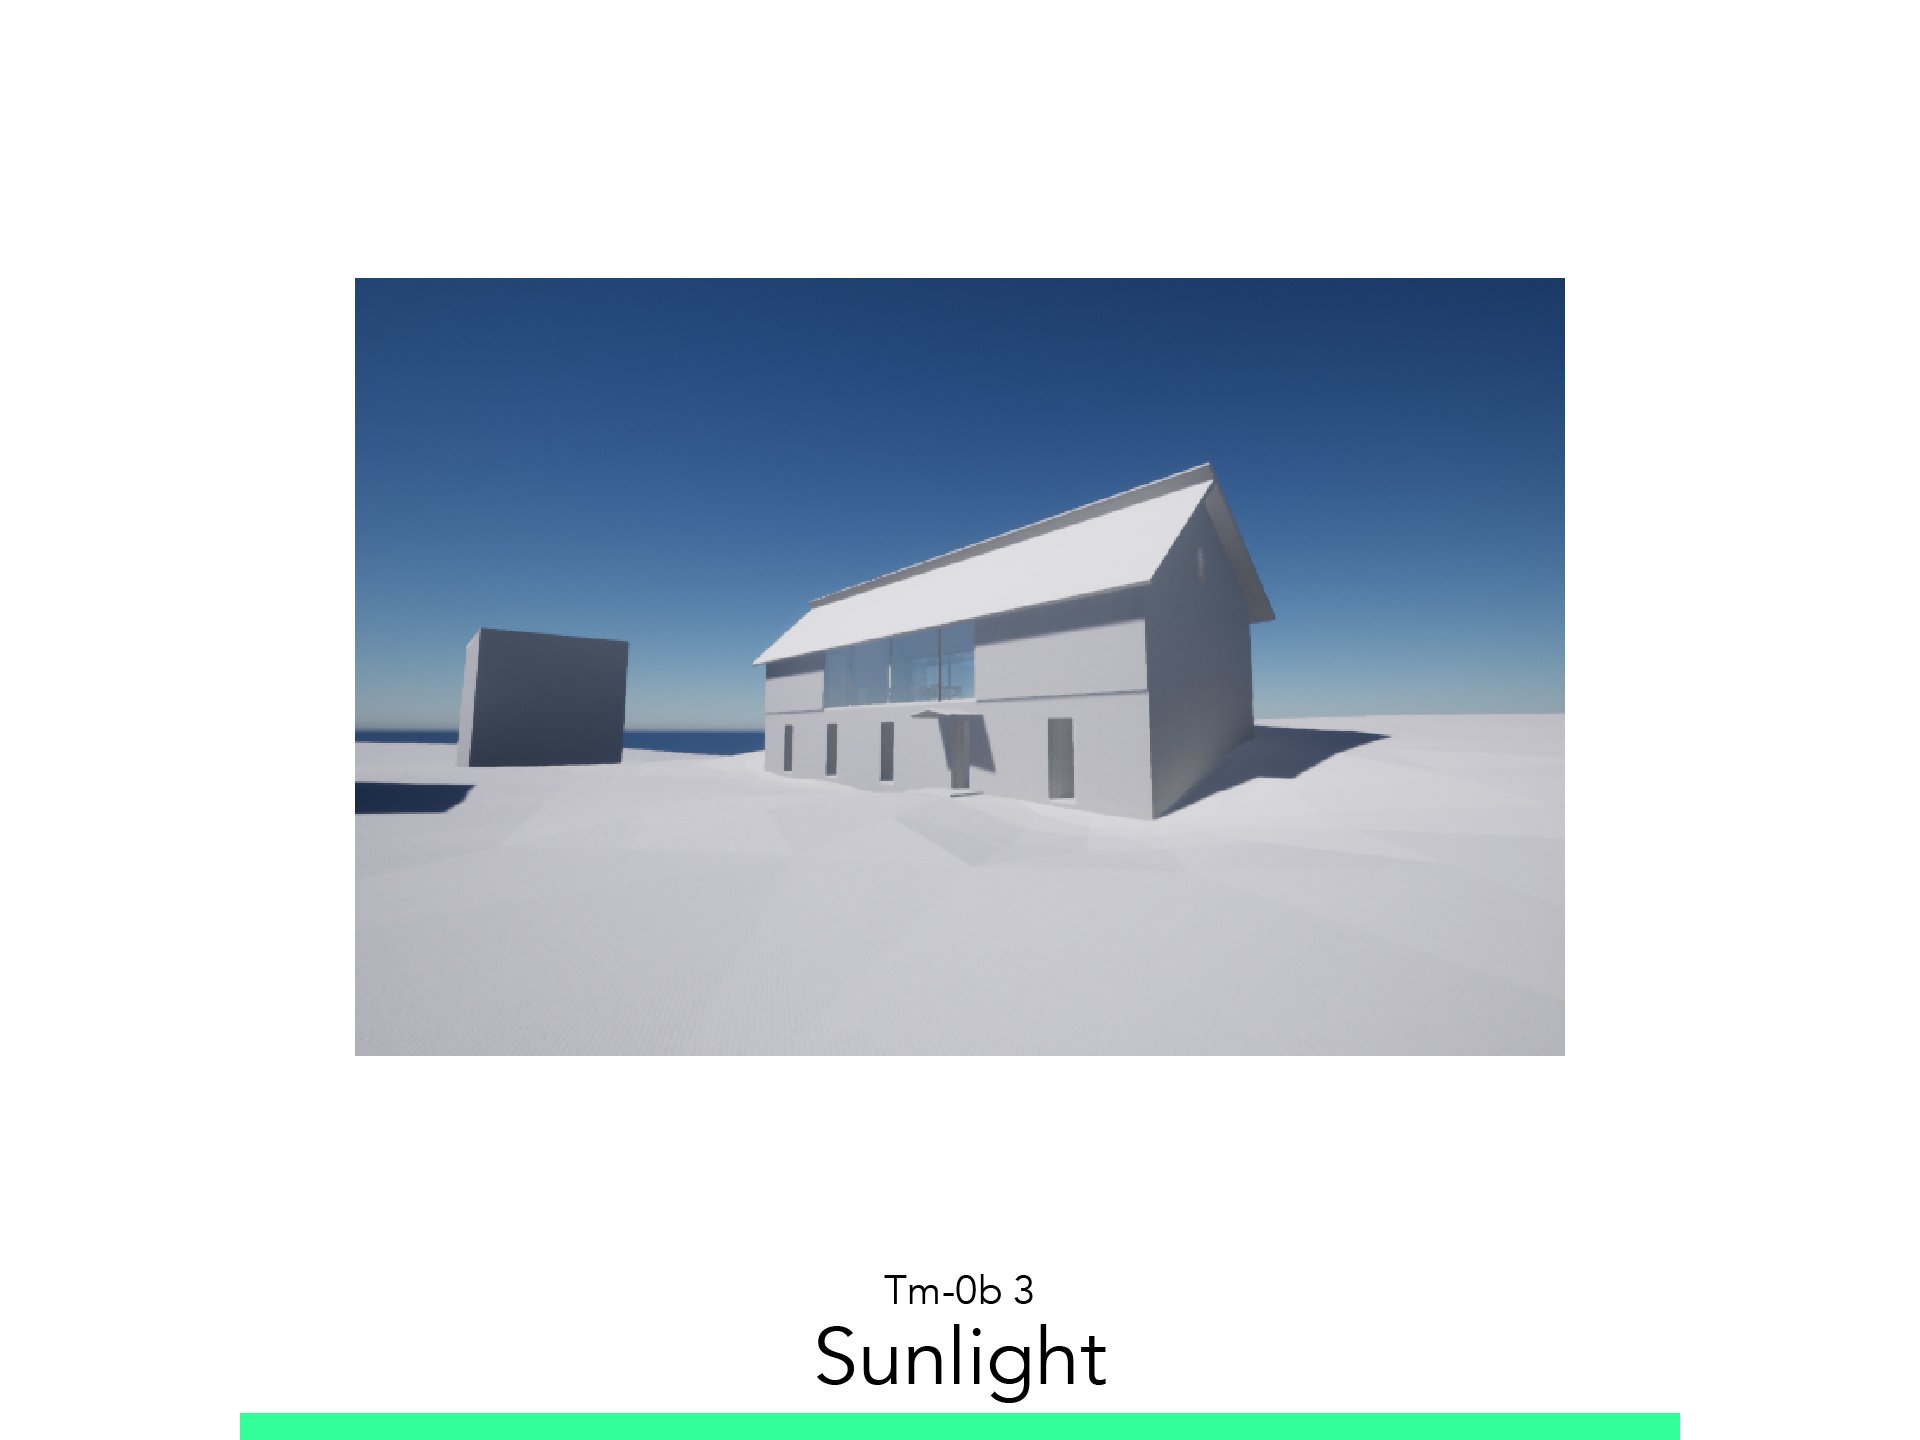
3. Sunlight

3.1. Set Sun Position
Go to Lower Bar > Media > Image2 > More > Location
Set Date and Time
3.2. Modify Lighting
Go to Lower Bar > Media > Image > Outside > Lighting
Adjust the Following Settings
White Balance: 5500
Exposure: -0.10
Shadow: 1500
Sun Intensity: 70,000
3.3. Render!
Go to Export.
Select in Image: Outside
Start Export.
Select the location file.
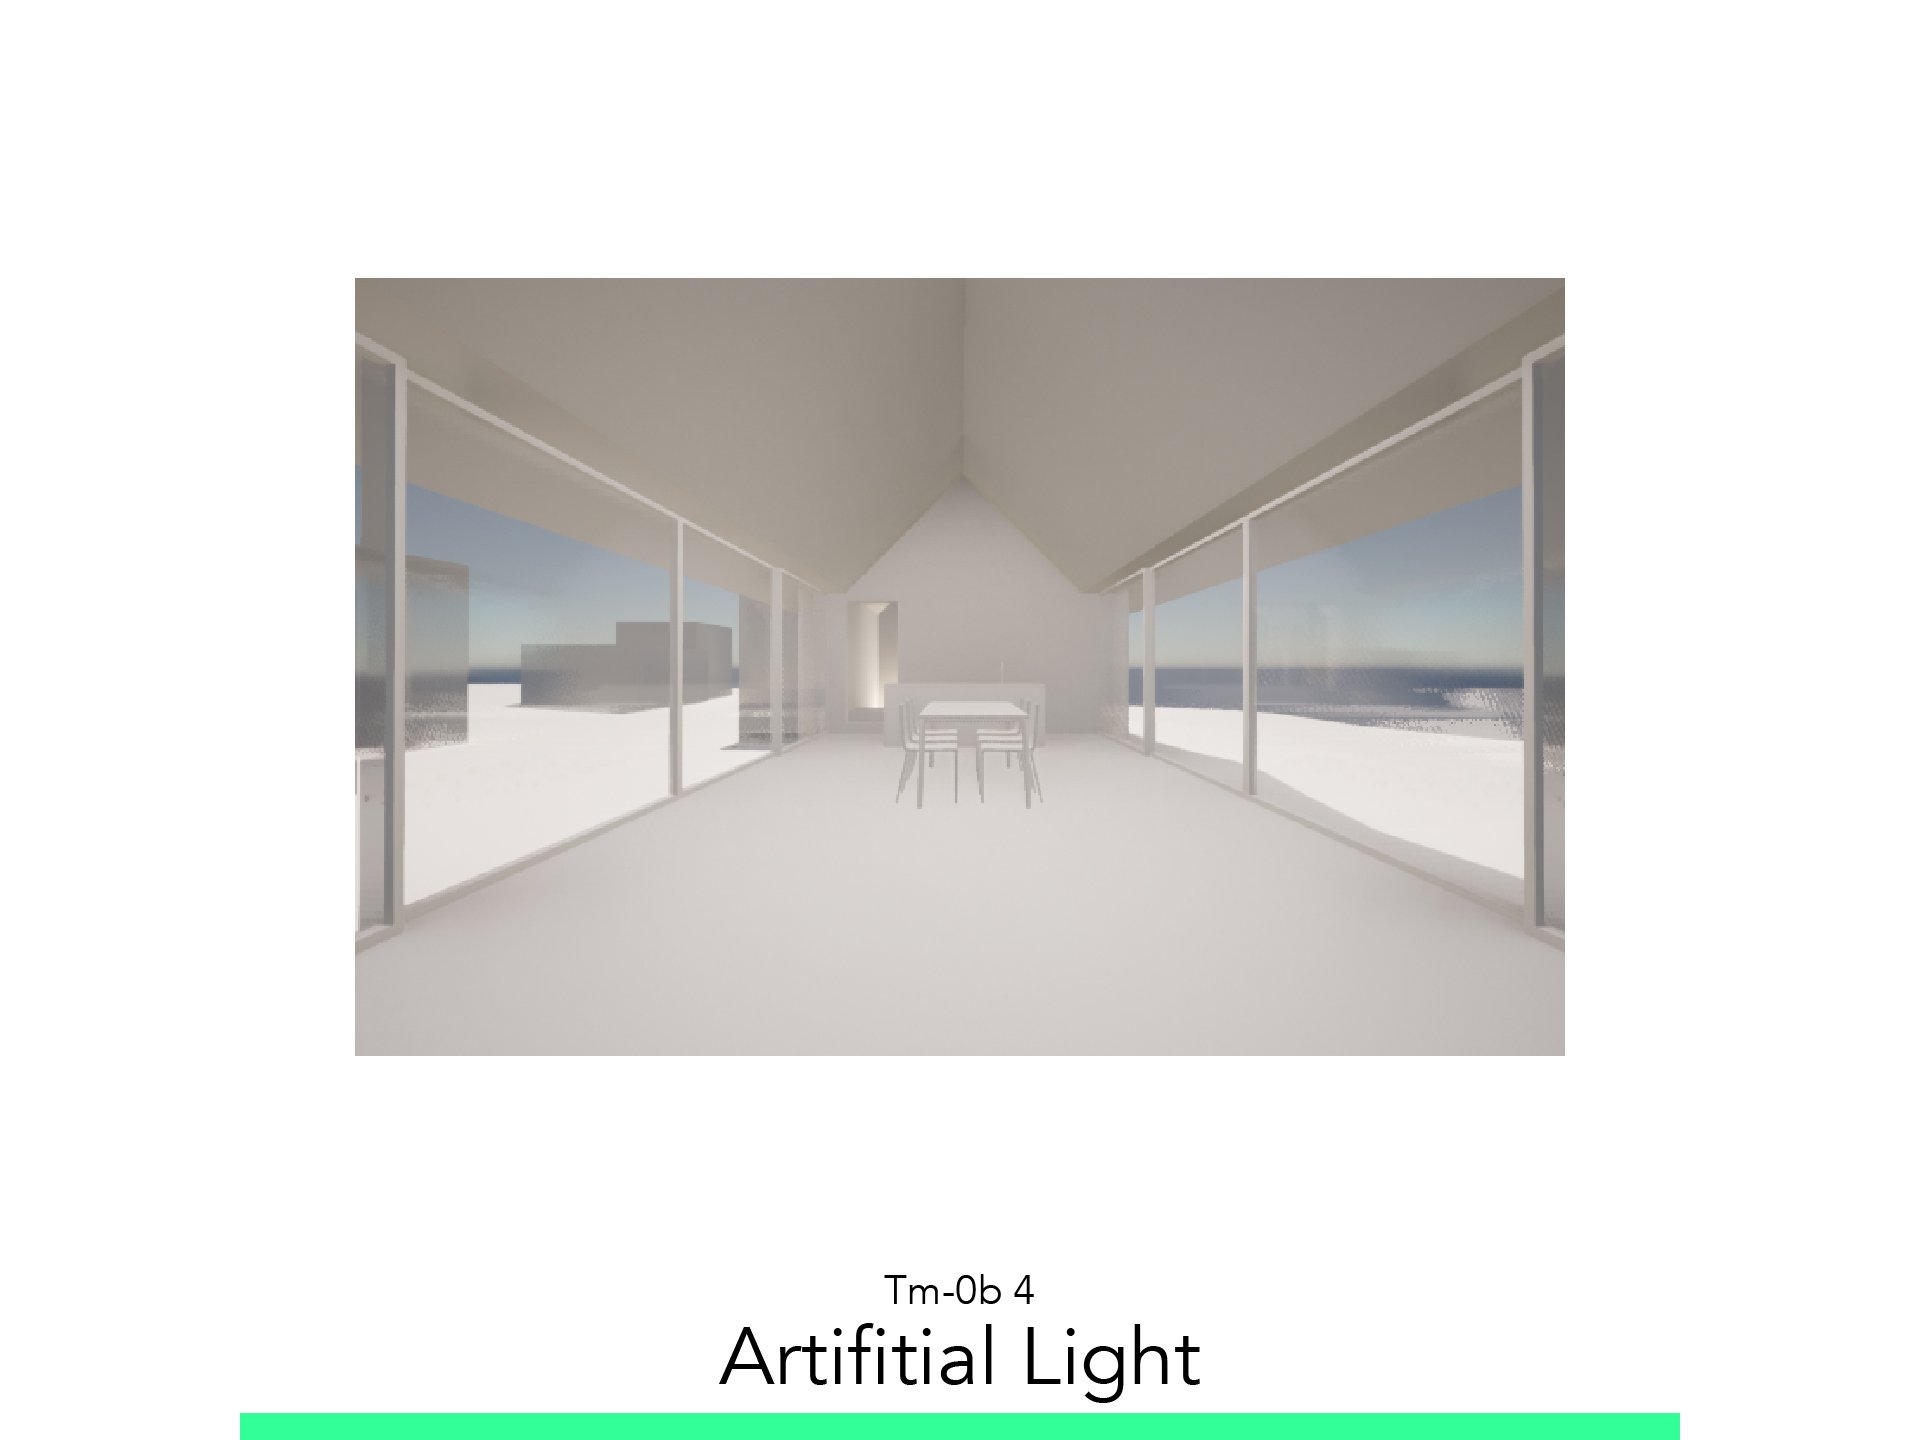
4. Artificial Light

4.1. Glass Material
It could happen that the Material isn’t differentiated in the Rhino model, in that case you should go back and assign a Glass Material.
Open the Left Arrow.
Go to Materials > Glass > Clear Glass.
Grab and release the material over de Windows.
4.2. Find the Interior View
Go to the Lower Bar > Media > Image.
Click on the Interior view.
4.3. Rectangular Light
Open the Left Arrow.
Open the Lights File.
Take and release Area Light.
Select the Light
Adjust the Following Settings
Intensity: 1’000.000
Color: 6000K
Length: 9m
Width: 4m
Attenuation: 10m
You can move it with the Gumball of the Object.
4.4. Linear Light
Open the Left Arrow.
Open the Lights File.
Take and release Neon Light.
Select the Light.
Adjust the Following Settings
Intensity: 1’000.000
Color: 4500K
Length: 4m
You can move it with the Gumball of the Object.
4.5. Render!
Go to Export.
Select in Image Inside.
Start Export.
Select the location file.
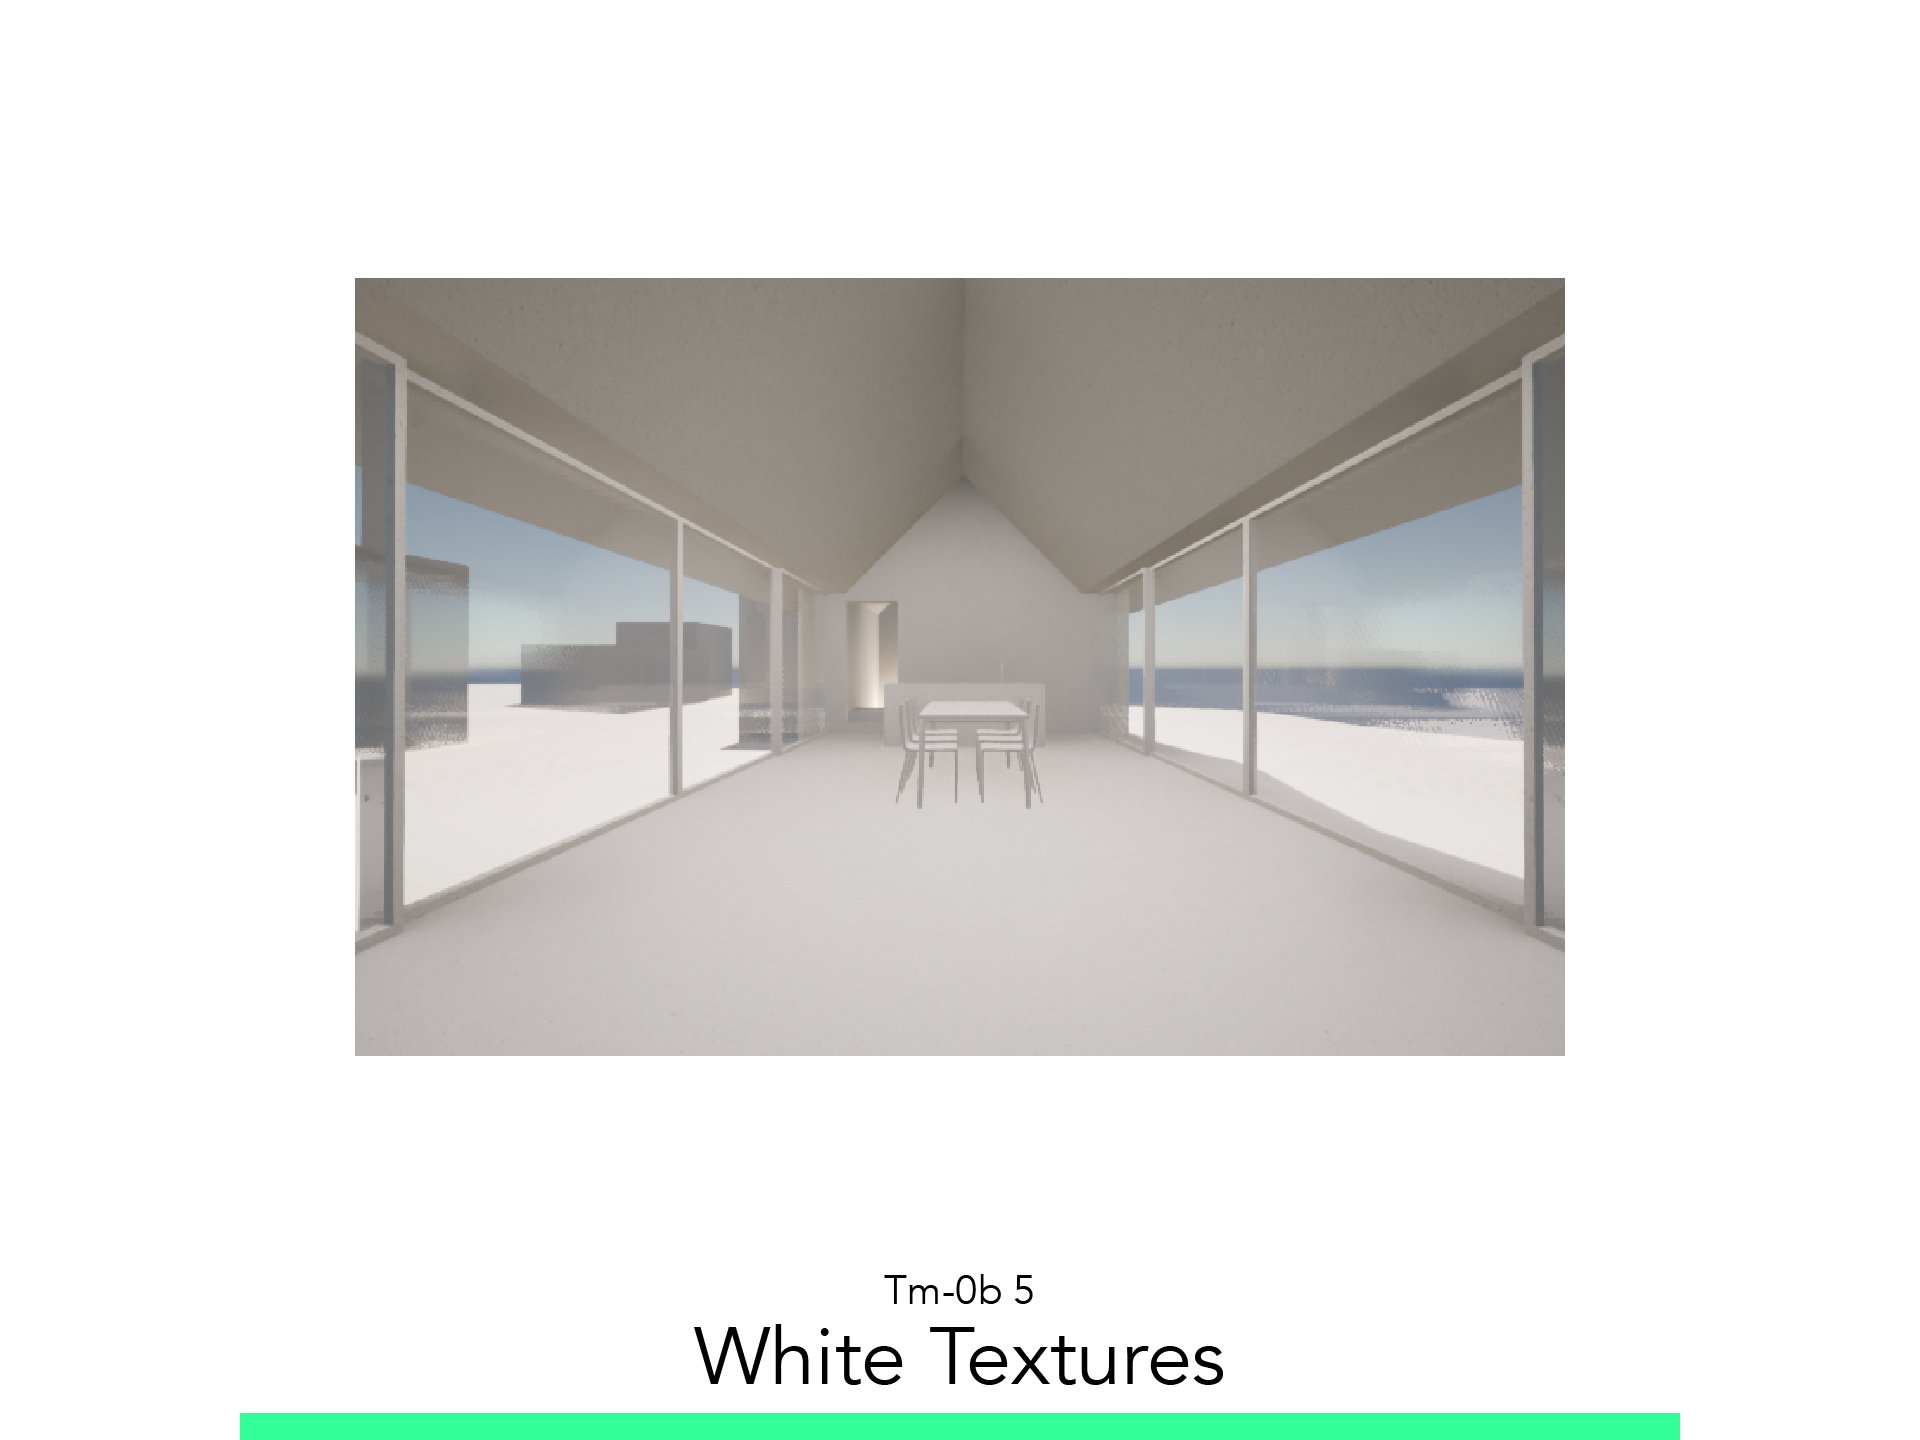
5. White Textures

5.1. Clay Filter
Go to the Lower Bar > Media > Image
Select More in the image you want.
Go to Camera > Visual Effects > Clay Render
Change Enable to On.
Open Selection and uncheck Glass.
Change Color.
5.2. White Material
Open the Left Arrow.
Open the Materials File > Wall Covering > Plaster Coating 03.
Take and Release over the White Material.
5.3. Texture Mapping
Use the Material Picker (Dropper Icon) over the Lower Bar.
Click on the White Material.
Change the Scale to 0.5.
5.4. Render!
Go to Export.
Select in Image Inside.
Start Export.
Select the location file.
Follow your study path with these recommended tutorials


Model in ArchiCAD for the absolute first time with me!
Let me teach you basic commands of the software for you to be ready work on your projects. Start from the very basics and follow me step-by-step in the process of giving more detail to your architectural model.