Cu-0 Ultimaker Cura Foundations


About this Tutorial
This course is intended for first time user of Ultimaker Cura and/or 3d printing as subject. Self-taught users can also profit from the structure to consolidate essential concepts. There is a lot explaining while i leave some time for you to click around the software with me, thus gaining a first experience with its user interface and the tools that will help us to achieve a good and clean 3D Print. We end the course by generating your first 3d printable file, known as GCode.
Skill level and duration
Level: First Time Users
Duration: A couple of hours tops!
In this tutorial you will learn
Download and Install
Setup your Printer
User Interface
First 3d Printable File, a Cube
The materials you will need
Your laptop with internet connection to download and Install Software during the course.
Tutorial content
• 4 Videos
• Full Tutorial Script
• Sample 3D Printable File
Why take this tutorial
Ultimaker Cura is one of the most popular 3D Printing softwares, here we want to take a look and learn some basic tools and parameters to take in count in the production from a STL model to a 3D Printing GCode. 3D Printings software is a particular mode of production, because we are taking a digital model and thinking how to lead the 3D Printer to produce it in real life, so this first look at the program its fundamental if you want to start in the world of 3D Printing.
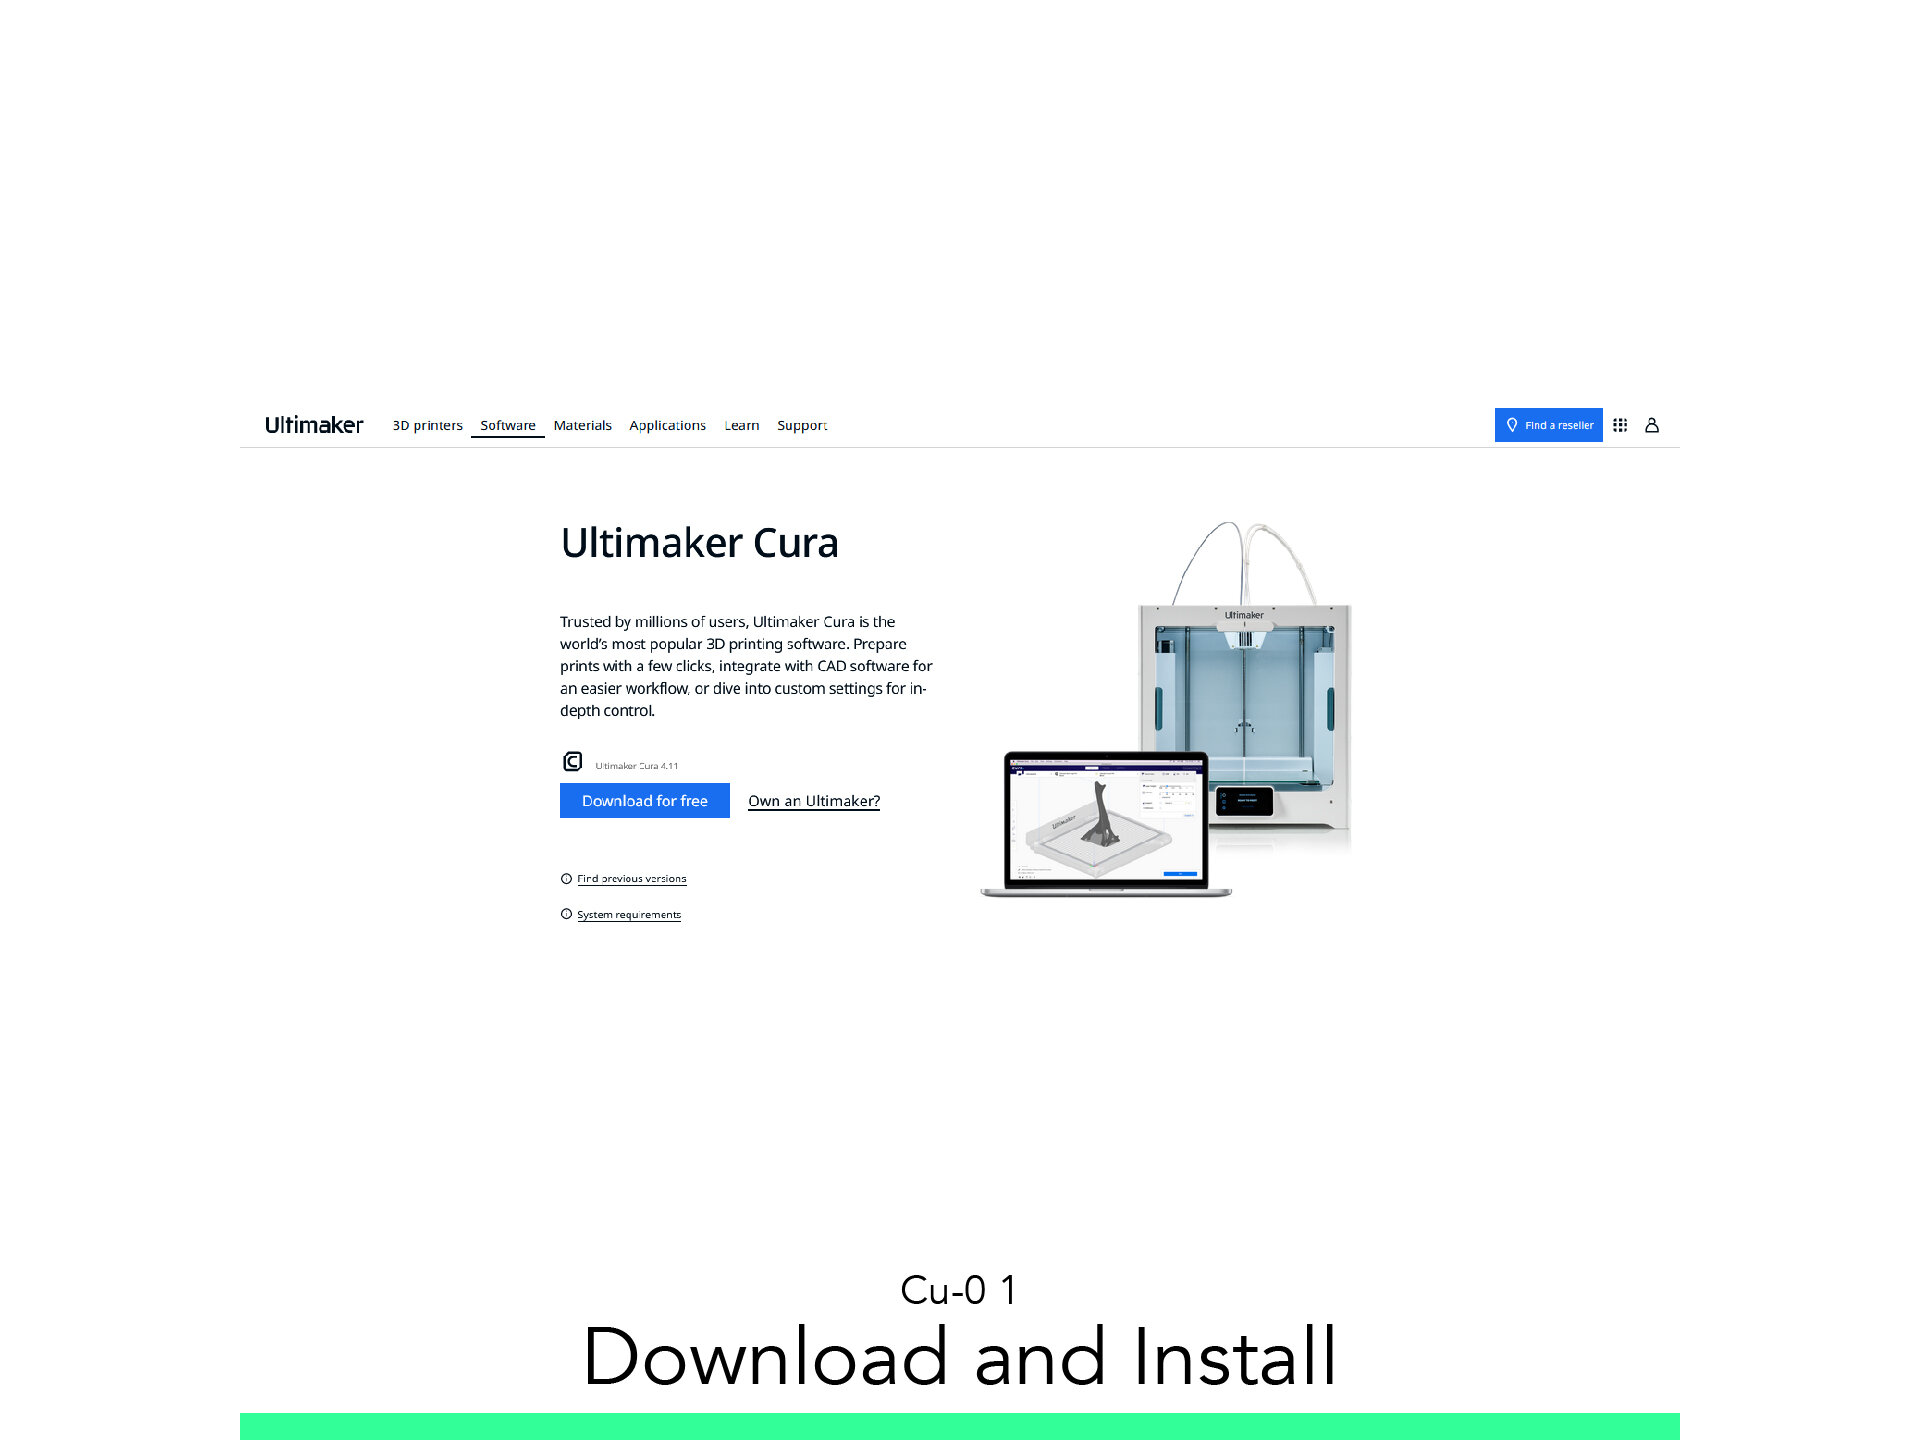
1. Download and Install

Download Ultimaker Cura for Mac or Windows.
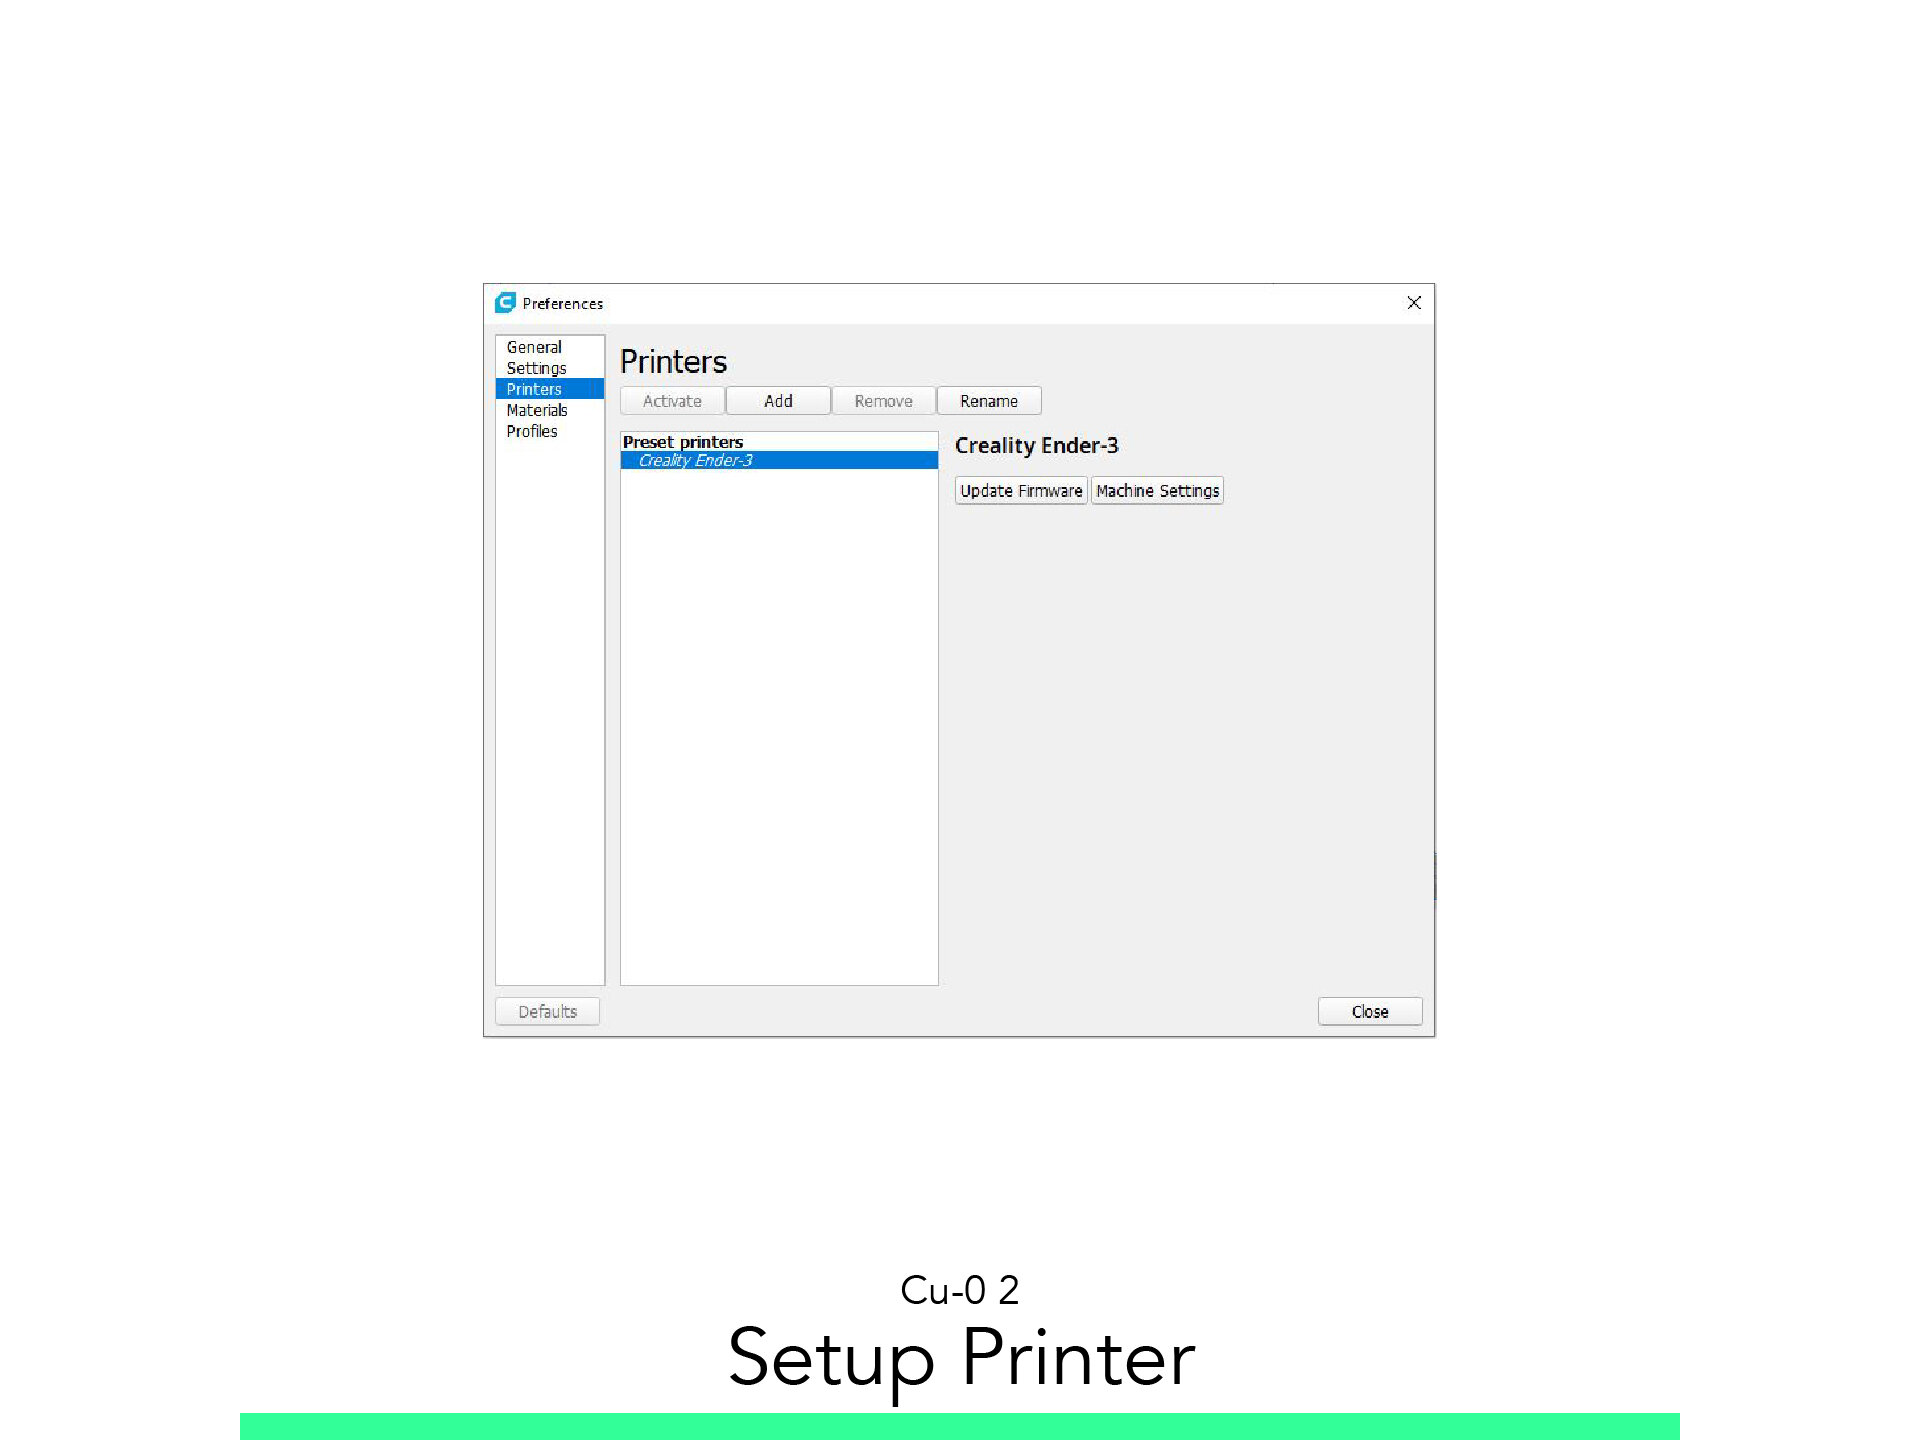
2. Setup Printer

2.1. Configuration Assistant
Add your Printer.
Machine Settings.
You can change the printer on Manage Printers.
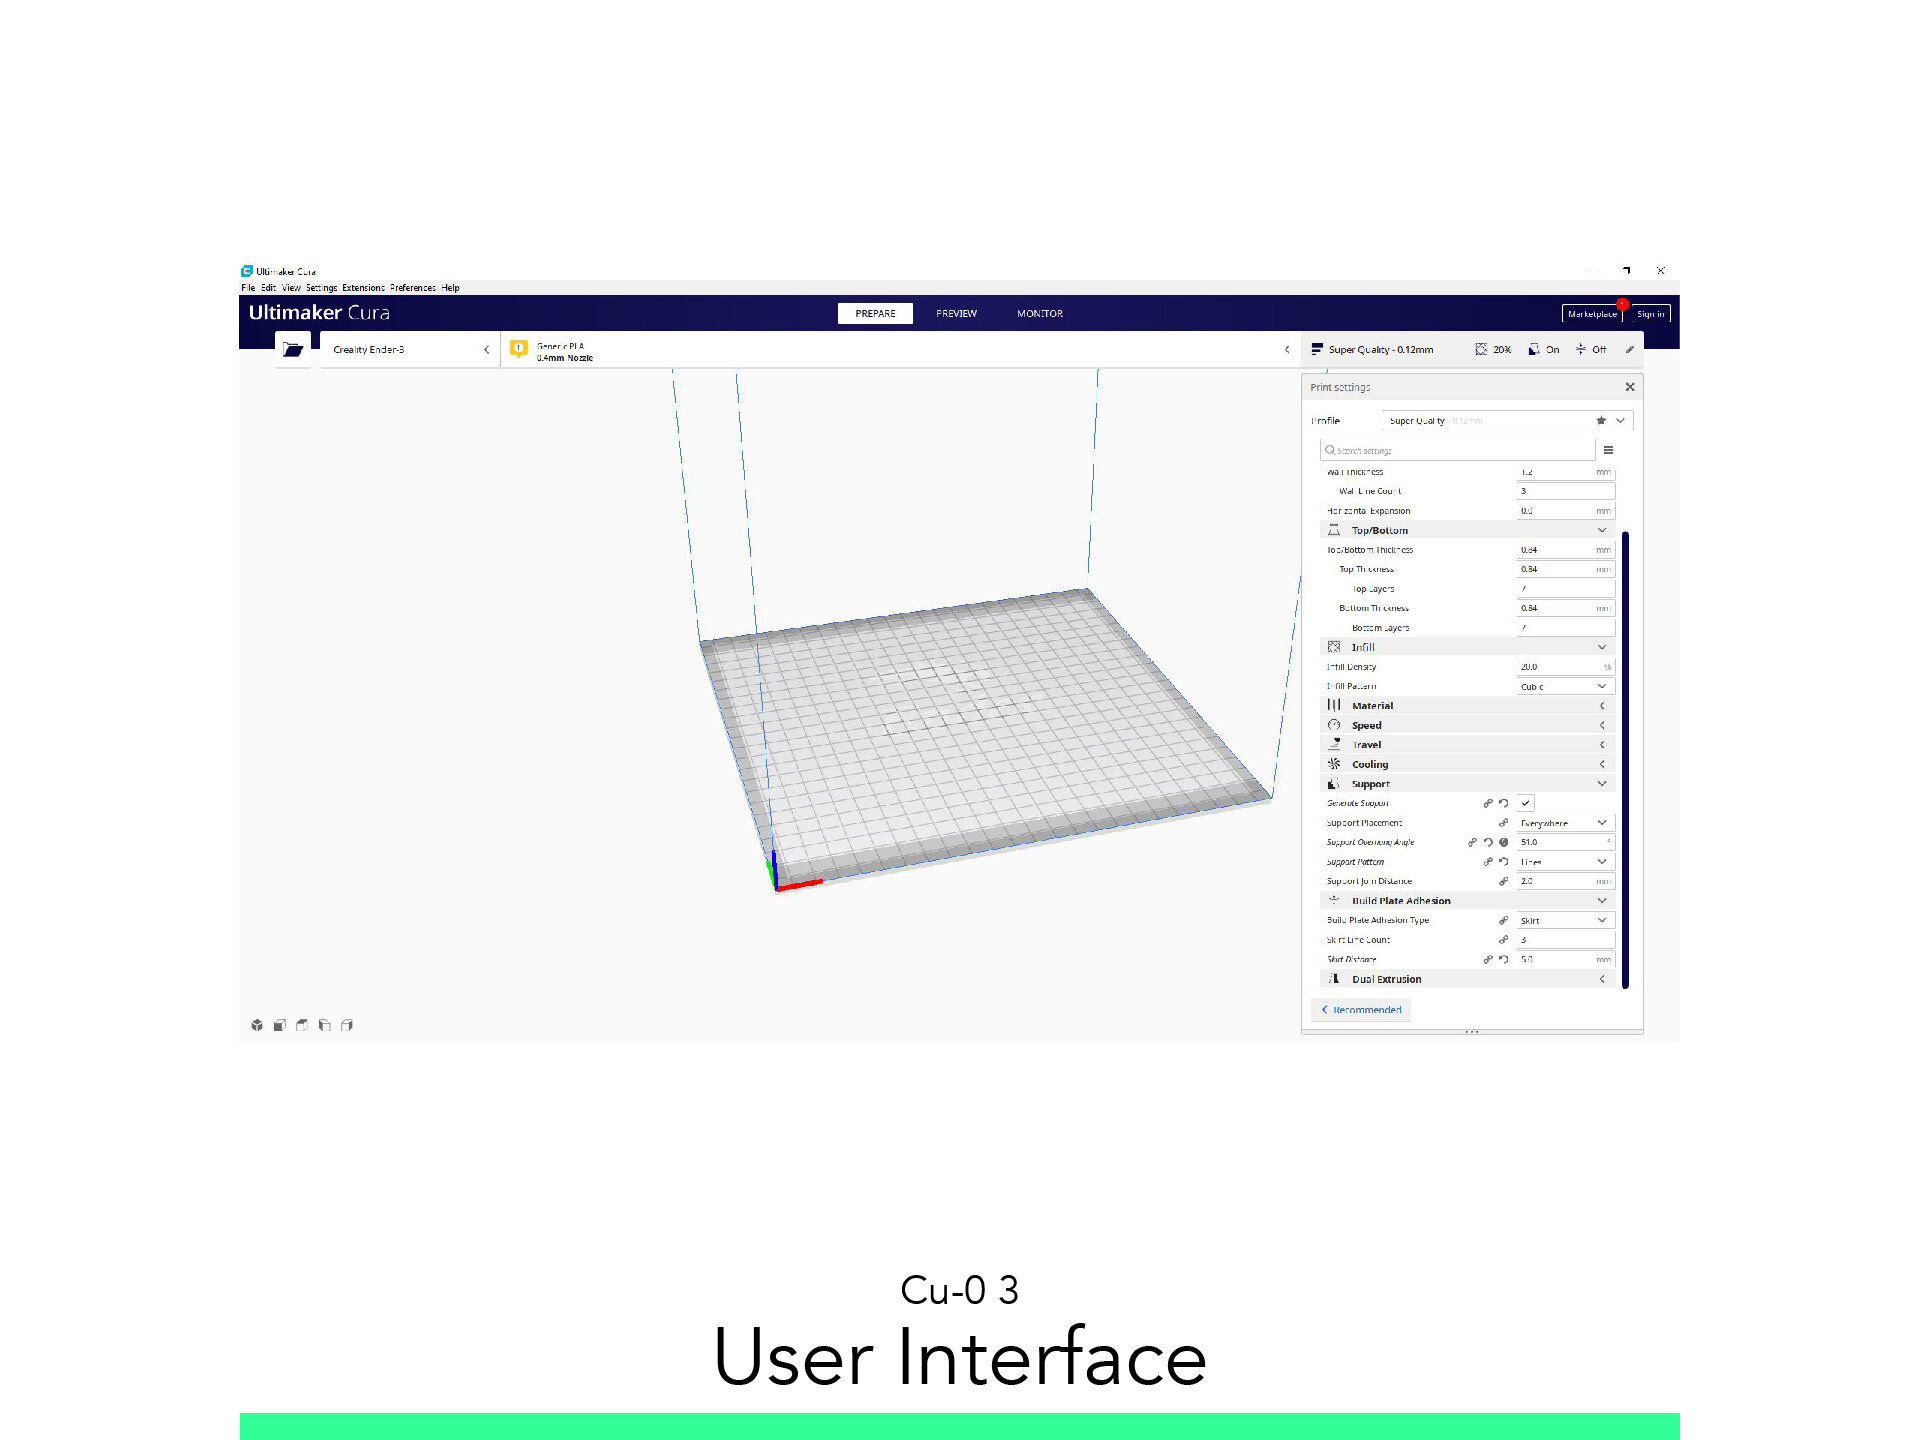
3. User Interface

3.1. Navigation Tools
To Pan: Click Scroll
To Orbit: Right Click
To Zoom: Scrolling
3.2. Viewing Modes
There are three sets of View of the Model:
To modify the solids: Prepare
To see the Slice Result: Preview
To Monitor your connected 3D Printer: Monitor
3.3. Object Commands
In the left side you can find the Tools:
Move
Scale
Rotate
Mirror
Per Model Settings
Support Blocker
3.3. Print Settings
You can find Settings Tabs in the right part of the screen.
You can select between Custom and Recommended.
Profile
Infill
Support
Adhesion (Brim)
Walls
Top/Bottom
You can add more settings in: Preferences
3.4. Custom Plugin
Open Marketplace.
Select Plugins > Mesh Tools > Install
Select Object.
Right Click > Mesh Tools > Split Model into Parts to Break Model.
Arrange as you need.
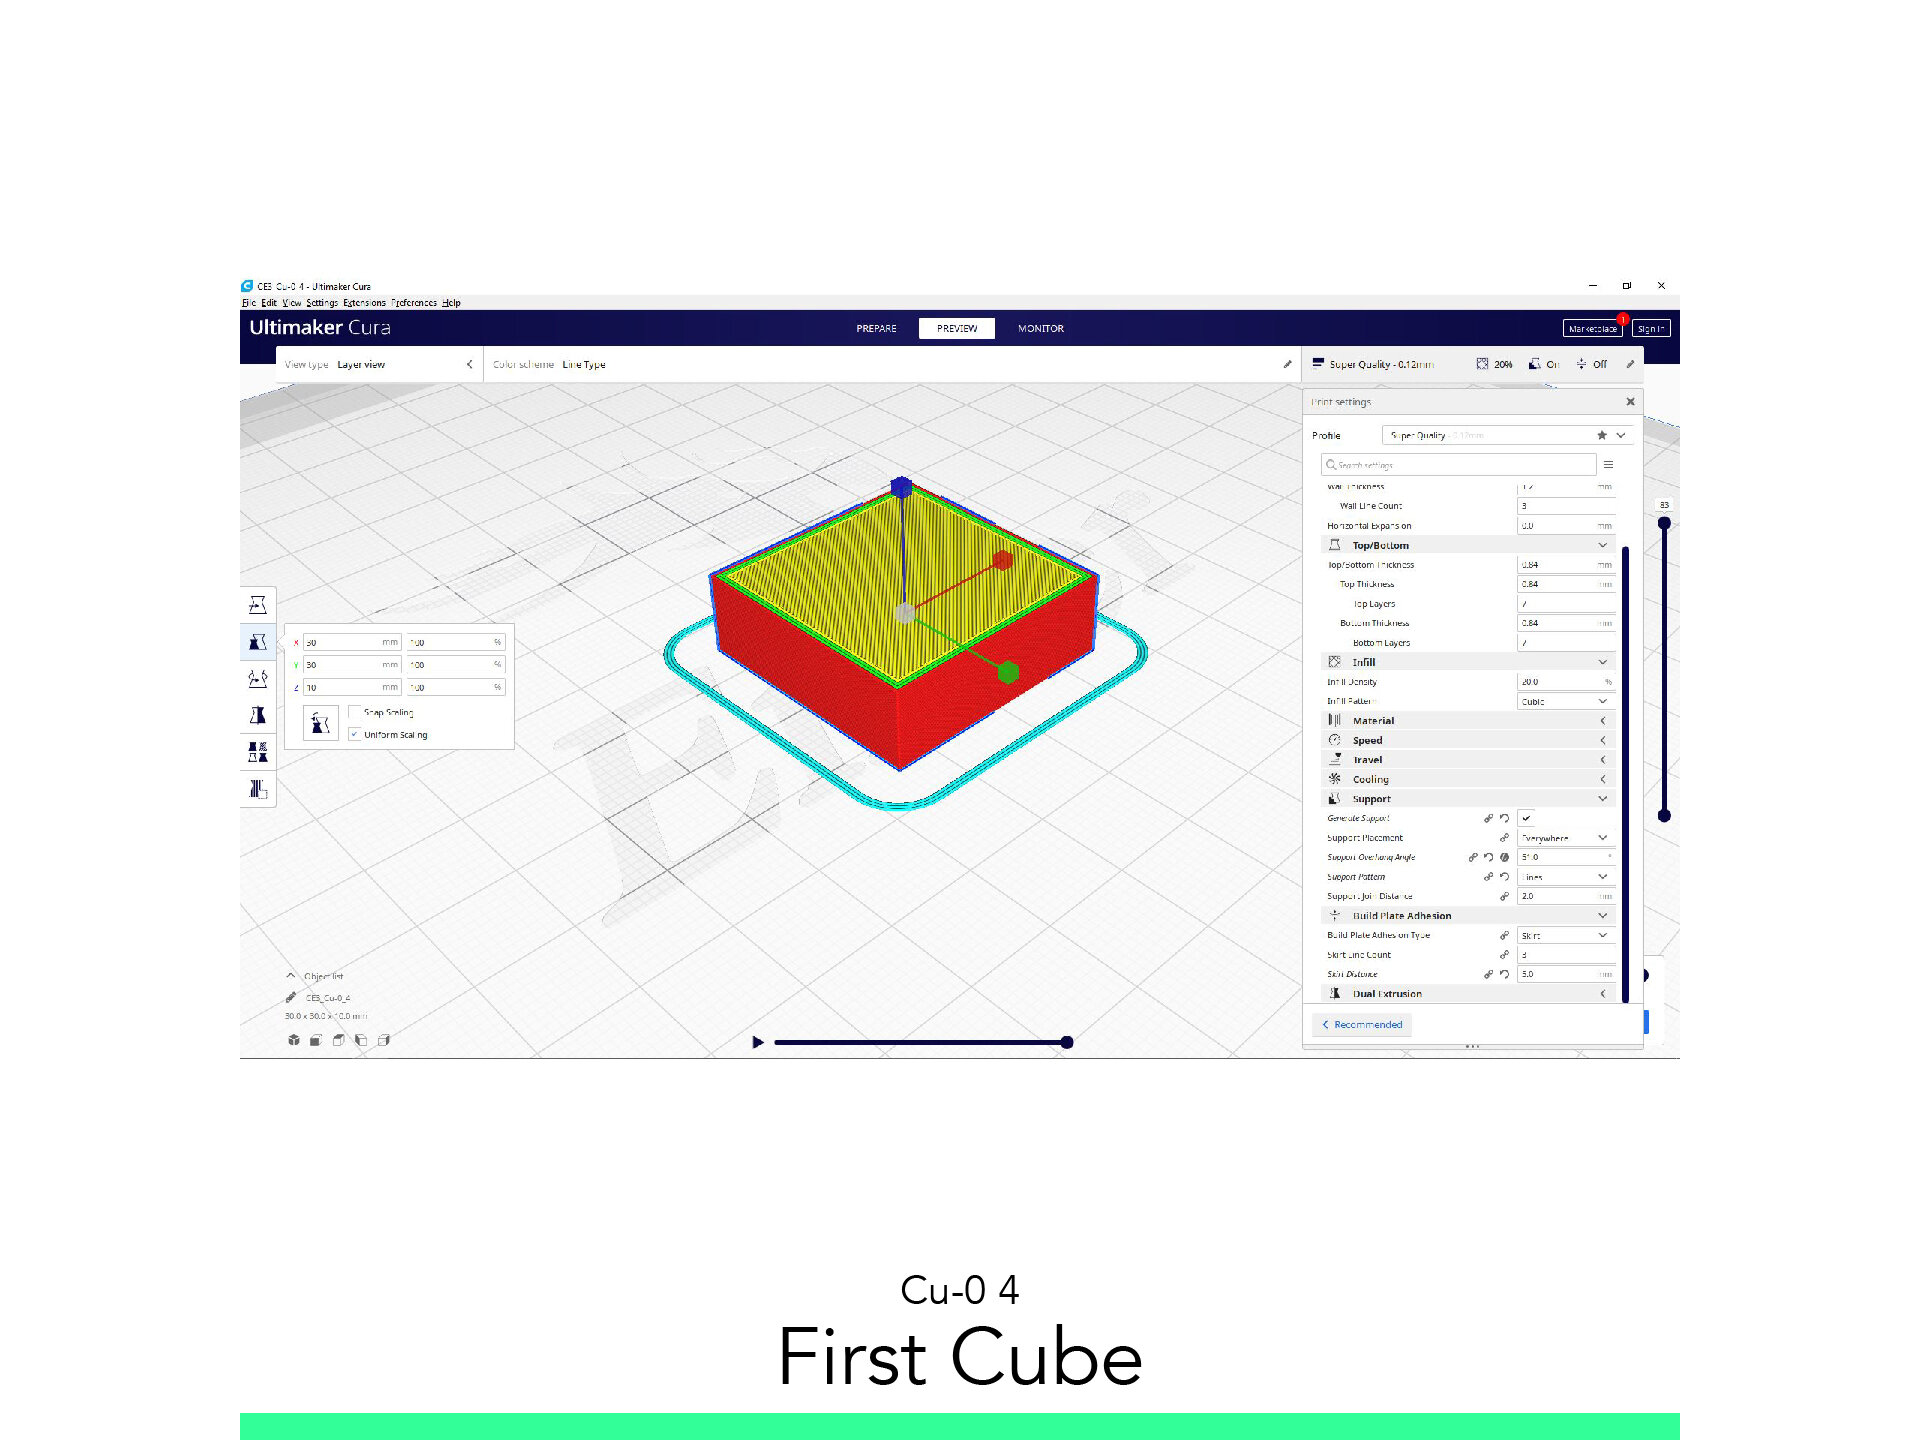
4. First Cube

4.1. Add Shape and Modify
To add Shape: Drag File
4.2. Printer Settings
Quality: 0.3 mm
Select Filament: PLA
Choose Printer.
Supports: Uncheck
Skirt
Infill: 20% Grid
4.3. Slice
You can find the Layer Selector in a right bar where you can view layer by layer the process.
You can find the Printer Route in the Lower Bar where you can see all the way of the printer.
4.4. Export
Insert your SD Card to your computer.
Export G-code.
Organize Filename.
Last Name _ Model Name _ Scale _ Machine _ Print Time
Eject and Print.
Follow your study path with these recommended tutorials


Model in ArchiCAD for the absolute first time with me!
Let me teach you basic commands of the software for you to be ready work on your projects. Start from the very basics and follow me step-by-step in the process of giving more detail to your architectural model.